Miscellaneous

The 2014 Southwest Maker Fest in Mesa, AZ

The 2014 Southwest Maker Fest in Mesa, AZ

Saturday (March 22, 2014) I attended the 1st Annual Southwest Maker Fest in Mesa, AZ. It was very cool for a 1st annual version of a fest, I must say. I've officially been calling myself a, "maker" for about 5 years now and I had never been to a maker-anything to speak of. This was a lot of fun.

The very first thing I saw as I walked from the parking lot was one of the amazing Rally Fighters from Local Motors.

Touch Screens: Some Interesting History and Info

Touch Screens: Some Interesting History and Info

I stumbled onto an article about touch screen technology through Twitter via Atmel. They gave a tiny little piece of history on touch screens and have a great infographic on it. I took one of the names and started searching and found cool little nuggets of useless but fun information on the subject and wanted to compile it here. Most of it is just regurgitating Wikipedia, but it's still nice to have it all written up concisely and not so encyclopedically-sounding. If you'd rather read all this unfiltered, it's at Wikipedia here (about touch screens in general) and here (about multi-touch). I've just reorganized and distilled it all. Accuracy is not guaranteed and was not at all verified. If I were to write a book about it, I'd go double-check all this stuff. This is a blog. It's not worth the pixels it's printed on. As stated in the Atmel article, touch screens are EVERYWHERE now. So much so that children think screens that do not respond to touch are simply broken. A monitor without touch is, well, quaint. Remember that scene from the movie "Star Trek 4: The Voyage" where Scotty talks into the MacIntosh mouse? "The keyboard... How quaint."

Charlieplexing LEDs with an AVR ATmega328

Charlieplexing LEDs with an AVR ATmega328

How many times has this happened to you? You have a little LED project with an AVR ATmega328 microcontroller (or Arduino) at its core and you need to light up a boatload.... A dingyload of LEDs. Maybe it doesn't happen a lot to you. It's happened on three recent projects for me. My latest two LED projects are a timekeeping piece that illuminates 21 characters from behind and a simple LED chaser thing.

As usual I wanted to keep the component count down on these projects. I also tend to prefer not to use a ton of ICs with busses between them and whatnot, if I can help it. So much darn soldering and stuff. Meh. Luckily, back in 1995, so the Wikipedia story goes, a super-smart dood named Charlie Allen at Maxim Integrated devised a super-ingenius way to control a large number of LEDs using a not-so-large number of microcontroller pins. The method is called, "Charlieplexing" and it seems a but daunting, at first, but it's not that bad once you figger it out.

2012 Kentucky Bourbon Festival

2012 was the second year I visited Kentucky for the Bourbon Festival. Just like 2011, it was a hoot. This time around (see my previous post) I was able to hit the entire Kentucky Bourbon Trail in one trip. The combination of the two made it that much more enjoyable. Because I was sloppy about taking photos this second trip, I am going to borrow some photos from 2011 for scenery, but not events. We wandered into town and as usual started in the Bardstown center of downtown to get our tickets and passes and whatnot. The building is beautiful and the people are friendly as can be.

Bardstown Center of Downtown

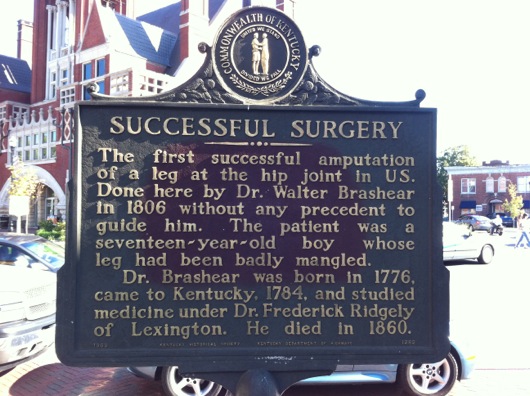
Also, this is a famous place, in case you were wondering and I'm sure you were:

Site of First Amputation from Hip Joint

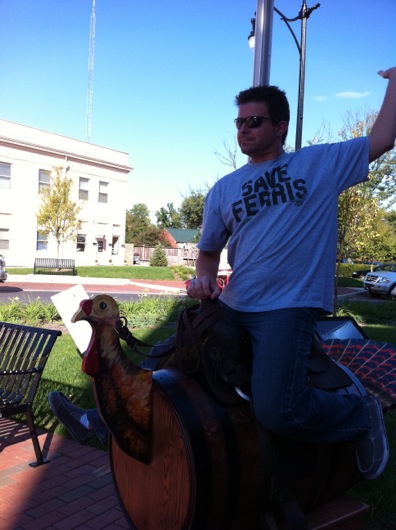
In 2011, I rode a turkey barrel.

Turkey Barrel Ride

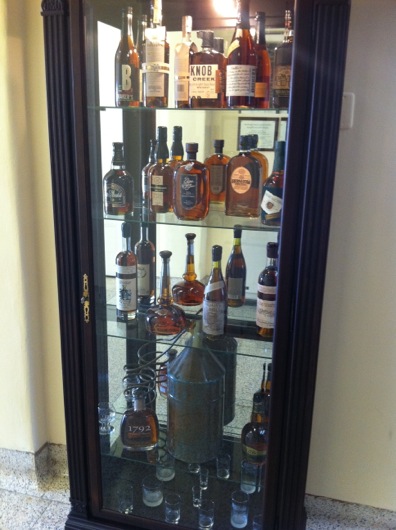
Oh, so many... YUM!!!

So Many Bourbons in One Cabinet

The first night at the Bourbon Festival, we always eat dinner at the Old Talbott Tavern, seen here flanked by chuckleheads:

Old Talbott Tavern Circa 1779

While waiting for our table, I found my signature hat (supplants my signature University of Michigan hat):

Just Add Bourbon Hat

For an appetizer, my buddy Ritch (right-hand chucklehead above) suggested Kentucky "burgoo." It's a stew-soup thing. It was absolutely delicious and I wanted to eat it the entire time I was there. But, I had to save room for bourbon, of course. Oh, and steak:

Old Talbott Tavern Food is Delicious

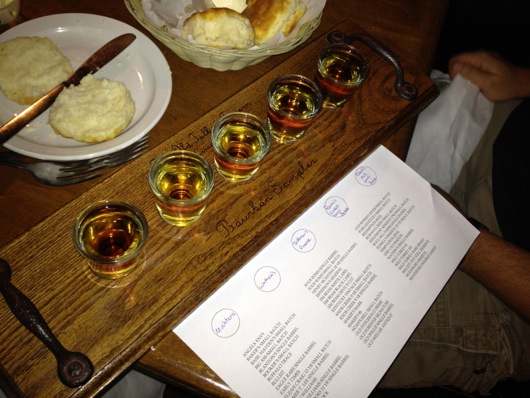
Throughout our feast at the Old Talbott Tavern, we were sampling bourbon, of course:

Old Talbott Tavern Bourbon Sampler

This year we sampled Michter's, Wathen's, Jefferson's Reserve, Rowen's Creek Small Batch, and Noah's Mill Small Batch. Every single one of them was delicious. The biscuits made great palette cleansers, too.

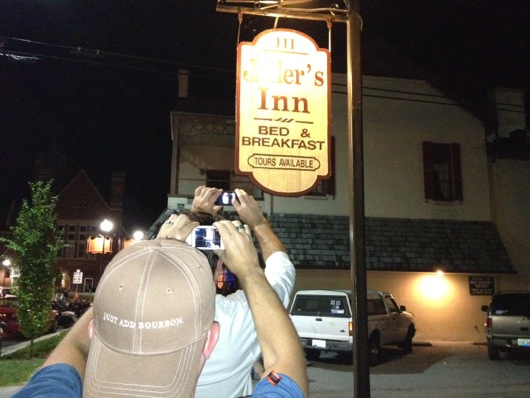
After dinner, in order to get to the main Bourbon Festival happenings, we walked past the Jailer's Inn Bed & Breakfast. So, we took photos.

Jailers Inn Bed and Breakfast

And we took more photos...

Jailers Inn Photo Opp

And then there's the obligatory shackles photo that EVERYONE was doing when they passed this place:

Dan in the Jailer's Inn Stockade

I won't even attempt to say what night we did which thing, so I'll just talk about what I remember from a given night, sparked by photos I'm finding in iPhoto. I'll have the events correct, but probably not the actual night it happened.

One of the nights, we hung out TWICE upstairs with the Angel's Envy party people in the historic Spalding Hall building in the center of the Bourbon Festival. It was dimly lit, had great music playing and they were serving their new Angel's Envy bourbon, which is finished in ruby port wine barrels. It was so smooth and sweet. Absolutely delicious.

Angels Envy Upstairs Party Lounge

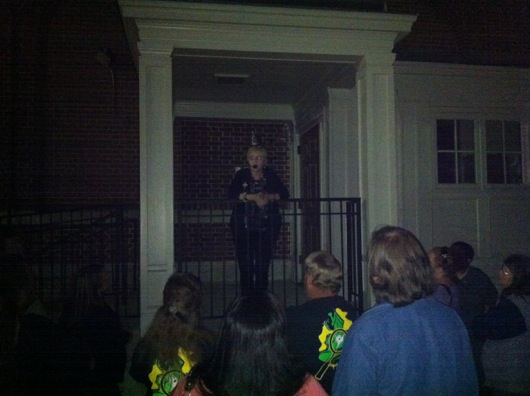
In 2011, we took the guided ghost tour because Ritch is big on ghostly things and it sounded like fun. A lady with a little mini amplifier and a fast-food-drive-thru headset talks you through all the stories as you walk around downtown. It's a hoot!

Ghost Tour Start

It winds up in a graveyard that is old as dirt and VERY cool!

Ghost Tour Grave Yard Finish

Eventually, we wound up downstairs at the Spalding Hall building for drinks and dinner. The bar side has sooooo many bourbons to choose fro, of course. Here's a photo of my buddies Dan and Ritch enjoying tea. OK, it's bourbon. The three of us hope to expand our troupe to more for 2013.

Ritch and Dan Enjoying Bourbon

Bardstown is a little town and it's beautiful. The center of town where the Bourbon Festival takes place is quaint and the people are friendly. Here's Ritch being a tourist:

Bardstown is Beautiful

If you haven't been to a Bourbon Festival, you have to do it at least once. Even if you're not a bourbon drinker, it's still fun. It's like the alcoholic version of the squash festival from the 80's movie Doc Hollywood. The town it great. The food is fantastic. The music is awesome. The people are super. The proximity to so many incredible distilleries is priceless. Get there. I'll be there with a slightly larger contingent than previous years, I think. I'll be tweeting like usual, so look me up.

2012 Kentucky Bourbon Trail

Kentucky Bourbon Trail Passport Stamp - Cover I now make the yearly pilgrimage to the Kentucky Bourbon Festival. I start out by flying into Nashville, Tennessee to make the road trip with my best friend, Dan. I've known him for 30 years (insert old jokes here). He works at Country Music Television (insert country music jokes here). I can't stand country music (insert... Oh, carry on). To prime my liver, however, we went to honky tonks in downtown Nashville. You can tell by the photo that I am not a country music fan. But, we had a great time, nonetheless.

Honky Tonks in Nashville

We started out the vacation sampling Dan's best bottle of bourbon, and at the time, his only bottle: Willett Single Barrel Bourbon. It was delicious. I have three of their bourbons in my cabinet: Willett Pot Still Reserve, Rowan's Creek, and Noah's Mill. All very tasty. I've created a bourbon drinker in Dan. He's building his collection.

Willett Single Barrel Bourbon

Jim Beam - September 14, 2012

Kentucky Bourbon Trail Passport Stamp - Jim Beam

First stop on the Kentucky Bourbon Trail: Jim Beam. If you look carefully in a select few photos throughout this tour, you'll see a repeating character, usually off to the side or hiding behind something and peaking out. Most often, he will have a finger up his nose. Classy is what we're about, you know.

Jim Beam Distillery

On the Jim Beam tour, there are these great, "Photo Spots:"

Jim Beam Photo Spot

Once you've seen one Photo Spot, though, you've seen them all.

Statue of Booker Noe, grandson of Jim Beam with the addition of a knucklehead, as my grandfather would say:

Booker Noe Statue at Jim Beam Distillery

Dan and I decided to wander the property at Jim Beam. I think we missed the last tour. We'll hit this one next year for a proper tour. But, if you do just wander, you can get a good fill of bourbon history. You can walk through "Warehouse D" on your own. It's really cool. The smell of a real live bourbon storage rack house is unforgettable.

Jim Beam Warehouse D Exterior

Here is an interior shot of Warehouse D:

Jim Beam Rack House

Heaven Hill - September 14, 2012

Kentucky Bourbon Trail Passport Stamp - Heaven Hill

Heaven Hill Distilleries makes a number of popular spirits that you've likely had or heard of, like HypnotiqChristian Brothers VS Brandy and Admiral Nelson's Spiced Rum. But we stopped by this particular distillery for the bourbon, of course. HH makes Elijah CraigEvan Williams and a new one that I hadn't heard of or tasted until this trip: Larceny, a wheated bourbon that was a tad strong neat, but was incredible with a tiny bit of branch water. In fact, during the tasting, they had us sample a little of the bourbon neat (some people winced). Then we added just a few drops of water to the bourbon and sampled it again. It was an amazing transformation of flavors. Where the flavors popped on your tongue also changed and suddenly a harsher bourbon was sweet and VERY palatable.

Heaven Hill Distillery

The tour of Heaven Hill was the first time I'd learned of the requirement for taller warehouses to have cross bracing in them to shore them up in case of tornados or earthquakes or giant Japanese sea lizards. I know from engineering basics and from flying parachutes with cross bracing that the triangular bracing is as strong as it gets. Since the tax man is so interested in the safety of the vast amounts of liquid gold in them thar warehouses, it's no wonder he wants the distilleries to brace the building. The HH tour guides will tell you why that is when you visit. ;)

HH Warehouse Crossbracing

I usually have Elijah Craig 18 Year Single Barrel and Elijah Craig 12 Year Small Batch in my cabinet and I like them both. I almost walked out of the gift store with the Elijah Craig 20 Year Single Barrel, but then I saw the $400 price tag (as I recall the number, anyway) on this Evan Williams 23 Year...

Evan Williams 23 Year Bourbon

Needless to say, there is no way on this earth that my wife would let me drop four hundos on a bottle of bourbon. It's nice to dream, though.

Four Roses - September 15, 2012

Kentucky Bourbon Trail Passport Stamp - Four Roses

Sadly, I can't find a photo of the outside of the distillery at Four Roses. It's beautiful and very familiar to, since I live in the southwest of the United States. The Four Roses building is done in a Spanish mission style architecture. Kinda common where I live. Nice to see in the middle of Kentucky. But, the interior is just as beautiful, especially to a bourbon enthusiast.

Four Roses Fermentation Vats

Condensers and stills and beers and wines, oh my...

Four Roses Stills and Condensers

The tail boxes are always cool to watch: So much pure white dog running out of the pipes. Amazing!

Four Roses Tail Box

And a tail box like I've never seen before: CLEAR...

Four Roses Clear Tail Box

Wild Turkey - September 15, 2012

Kentucky Bourbon Trail Passport Stamp - Wild Turkey

We were in a bit of a hurry at this point in the day, but I can't remember why. Could have been the barrel stacking races or we were hungry or something. Doesn't much matter. We were in bourbon heaven and we were going to be back again in 2013, so rushing one of the tours wasn't that big of a deal. Although, now I'm really looking forward to meeting some of the Wild Turkey folks in 2013.

Wild Turkey and Regular Turkey

As I write this article, I'm supping Wild Turkey Rare Breed (barrel strength). It's 108.2° proof, but is smoother than that sounds. It's absolutely delicious. One thing I used to be snobby about was mixing anything into better bourbons. However, like I mentioned above, at Heaven Hill I learned that adding a few drops or a splash of branch water to a shot of bourbon can really open up the flavor. You really have to try it for yourself. It's quite amazing. I like Rare Breed neat, no water added. But I wouldn't recommend against adding a tiny bit of water to take the edge off and twist the flavors a bit if the flavor is a little strong for your taste. It's great, either way.

Wild Turkey Rare Breed

Now, sadly, we didn't take the tour at Wild Turkey because we missed it by a little bit, but they were kind enough to bring us to the back tasting room and allowed us to sample their yummy bourbon wares in a kinda private little tasting session. It was awesome. I'd never had any of the Wild Turkey bourbons up to that point. I went right for the Rare Breed, of course and bought some immediately when I got home.

Also, the tasting room has a turkey.

Don't Touch the Turkey

Woodford Reserve - September 15, 2012
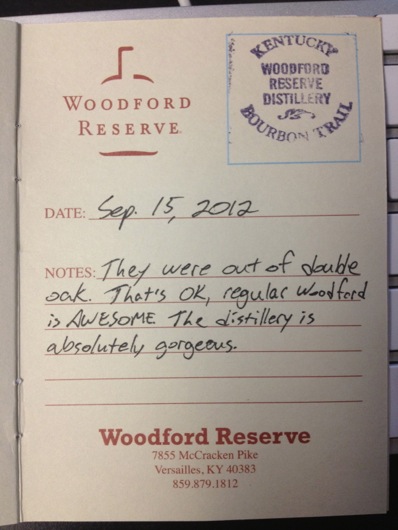
Kentucky Bourbon Trail Passport Stamp - Woodford Reserve

I know I say I love this bourbon and that bourbon and I say that a lot. Really, I've only met a couple of bourbons that I would consider, "eh." I just love the flavor of bourbon in general so much that I think I like them all. But, Woodford Reserve is most definitely one of my favorites. Even better is its brother, Woodford Reserver Double Oaked. Fantastic bourbon aside, you have to see the distillery! It is absolutely gorgeous.

Woodford Reserve Down the Hillside

The buildings are built with über-thick walls of limestone and wreak of history. Well, it helps that their distillery site is a national historic landmark, I suppose.

Woodford Reserve Historic Site

The warehouses on the property may not be as tall as competitor warehouses, but it would take a tremendous force to knock them down.

Woodford Reserve Limestone Warehouse

Everything at Woodford was so clean and neat. The pathways from one tour stop to the next was pretty open and the tour guides were very knowledgeable. Their three big copper stills were impressive to stand next to.

Woodford Reserve Giant Copper Stills

It was a vVery nifty area around the stills complemented by brass-trimmed tail boxes:

Woodford Reserve Brass-Trimmed Tail Boxes

It's always weird to think that the new barrels you see waiting to be filled are going to disappear into a warehouse somewhere for years and years. Here are brand new American white oak barrels waiting to be filled with Woodford Reserver "new make:"

Woodford Reserver New White Oak Barrels

Once those barrels are filled, they rolled on tracks to the warehouses...

Woodford Reserve Barrels on Track

The barrels stacked up and the bourbon maturing...

Woodford Reserve Barrels on Ricks

Delicious.

For some reason, it seems I took way more photos at Woodford Reserve than I did anywhere else. I have a couple of years of photos from Maker's Mark, so maybe I thought I needed to fill out my collection for Woordford in 2012. Who knows?

Maker's Mark - September 16, 2012

Kentucky Bourbon Trail Passport Stamp - Makers Mark

First off, let me note here that I am a Maker's Mark Ambassador, so there is a barrel in one of the rack houses with my name on it (mine and 19 other people). I've toured Maker's Mark twice, so far. I have Maker's Mark, Maker's 46 and Maker's White in my cabinet. This has always been my go-to bourbon because it's accessible just about everywhere. Is it my absolute favorite, hard to say with so many wonderful bourbons out there. Its flavor profile isn't as strong as I like, but it's still VERY delicious and I proudly serve it up at parties. It is a fine bourbon and I highly recommend it for sipping and for mixing. Maker's 46 is one step better, in my opinion. The flavors added by the additional staves used in the maturation give it more of the flavor profile I prefer. Maker's White (the Maker's right before it goes into a barrel) (or moonshine) is also quite tasty, but it's certainly an acquired taste. I used 2 liters of it to age myself in a Bluegrass Barrel (that post is coming shortly).

Makers Mark Visitor Center

Maker's Mark, like Woodford Reserve, is a beautiful property. The grounds are kept up very, very nicely. This was the first official bourbon distillery I'd ever seen and I signed up for the Ambassador program right away for fun. The tour is fantastic. The grounds, though, make you feel like you're walking around on a movie set, I swear.
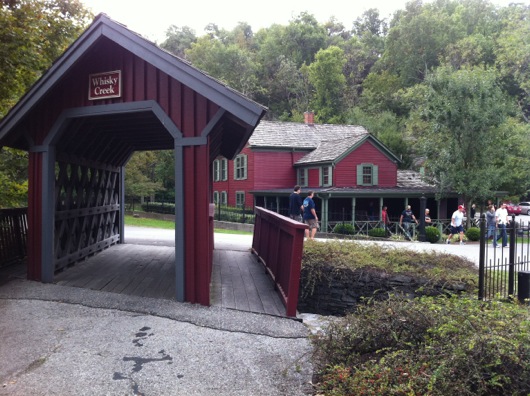
Maker's Mark Whisky Creek Bridge

The tour, like most others, is incredibly informative and everyone is so friendly. I'm always amazed that we can walk right up to the fermenting mash. It smells amazing and watching the yeast farts is mesmerizing.

Makers Mark Mash Fermenting

The ornamentation and finish on some of the equipement is incredible. The copper is polished to a mirror-like finish.

Maker's Mark Tail Box

The hilarious thing about the outside of the buildings is the detail in the shutters. You can see the shape cut out of each of them is the silhouette of the famous Maker's Mark bottle.

Maker's Mark Shutters with Bottle Silhouette

Maker's Mark New White Oak Charred Barrel

Somewhere in the Maker's Mark warehouses I have a barrel like this one with my name on it. Hopefully it doesn't have this large a hole in it.

Even the bottling line shares the architecture style of the buildings:

Makers Mark Bottling Line

Becoming an Amabassador is free. Go to the Maker's Mark website and sign up. You get your name on a barrel with 19 other people and it will mature and you will wait. When your bourbon is ready, you can travel to Loretto and dip your bottles (see video of me dipping my own) and enjoy the fruits of your patience. I can't wait!

Summary

Kentucky Bourbon Trail Passport Stamp - Completed

In summary, I'd totally do the Bourbon Trail AGAIN with friends. Many times. It's fun. I got a t-shirt. There are samples and there are samples. The countryside is gorgeous and the weather, knock on wood, has always been spectacular. All of the distilleries, even the ones not officially on the tour, are worth touring more than once. I swear I pick up more and more history and statistics when I hit each distillery. I've also been to the Jack Daniel's distillery in Lynchburg, Tennessee and it's equally as fascinating, even though JD is a Tennessee whiskey, not a bourbon. As a matter of fact, the JD tour is what got my taste buds yearning for corn whiskey when they puffed the mellowing tower lid in my face. If you visit them, you'll get what I mean here.

Save Buckyballs Rare Earth Magnet Desk Toys!

Consumer Safety Protection Commission FAIL!

This blog is all about making things, tinkering, DIY, etc. It's not a political site. However, when I heard that the Consumer Safety Protection Commission was filing a lawsuit against Buckyballs, I had to join the fight to keep the Nanny State out and help push personal responsibility. Please join me in joining the fight against the Nanny State and for personal responsibility. Tweet, post on Facebook, email friends, or simply responsibly purchase a set of balls for yourself at GetBuckyBalls.com to help this innocent and excellent little company stay in business.

Save Bucky Balls!

Lemme 'splain... I'm all for an agency to watch out for shifty products for me using tax money I send to Uncle Sam. However, I am NOT for said agency regulating on behalf of what should be personal responsibility. That smells of horse pucky and, more importantly, I think it's bunk that people aren't taking responsibility for themselves and those for whom they are responsible (minor children, pets, etc.).

If you find ADULT-level toys like, say, little round super-strong magnetic balls to be really fascinating, the first thing YOU should do AS AN ADULT is understand that the little magnetic balls are LITTLE. Repeating: LITTLE. As in, little enough for pets and children and STUPID teenagers to SWALLOW. Repeating: YOU. YOU should understand this AS AN ADULT WITH A BRAIN and YOU, the person responsible for the children and pets and STUPID teenagers, should be smart enough to store them away or NOT PURCHASE THEM AT ALL FOR FEAR YOUR CHILDREN OR PETS OR STUPID TEENAGERS MIGHT SWALLOW THEM.

The concept of YOU understanding that something is wrong or bad is your personal responsibility speaking to you. If you do not hear that little voice or vibe from within, you are NOT a responsible adult and, therefore, you probably should not be purchasing very strong little rare earth magnets for entertainment or relaxation purposes. I wrote, "YOU" to be sure I was NOT writing, say, a government agency like the Consumer Safety Protection Commission or some other Nanny State entity.

OK, back to Buckyballs. They are a tiny company that has done well and that EMPLOYS people. Last time I checked, our country was running a little low on employment. Seems that what they're doing is good for the people they employ. I also firmly believe, having played a plenty with the aforementioned little super-strong rare earth magnetic ball desk toys, that Buckyballs is doing many, many other people a service by providing a calming little pile of stress relieving building balls for their desks or man caves (in my case) or whatever.

What's even dumberer about this story is that the imbeciles at the CSPC APPROVED the safety program in place at Buckyballs in 2011 (per the Buckyballs website). Over 500 million balls sold. Less than two dozen incidents. There are MANY other for-adult toys or toy-like items that produce WAY more "incidents," I'm sure. Hell, hundreds of kids are sent to the ER for swallowing BALLOONS!!! Tens of thousands of stupid people swallow COINS that are minted by... THE U.S. GOVERNMENT!!! The CSPC needs to go after the U.S. Treasury and stop them from minting any more coins NOW!!!

The CSPC appears to be on a rampage against this little company and that's completely unfair, IMHO. Buckyballs have even created a safety website for rare earth magnets. They've done everything they can to make sure that consumers understand how to properly handle their product. They're not an evil corporation. They're a company of about 10 people plus a bunch of sales reps.

OK, I'm finished with that rant. Carry on and BUY BUCKY BALLS!!!

PC Power Supply Repurposed for Bench/Breadboard/Tinker Use

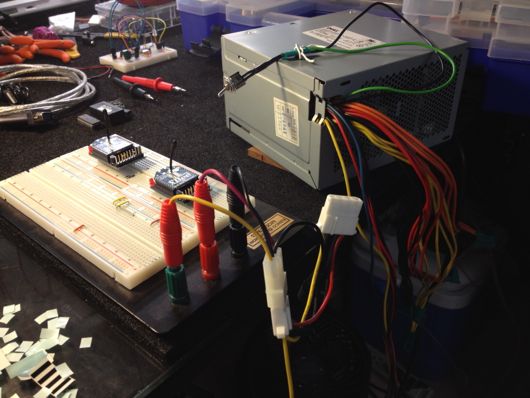
A friend and coworker of mine sent me a text today asking if I had instructions on how I built my benchtop power supply from a computer power supply. I realized that I had not written about that on this blog. That was dumb. Simple oversight. Anyone coulda done it. I've been using that silly thing for a long time and I think it might even be in the background of a couple of videos of photos up here. Funny. Anyhoo... Here's the quick how-to-karate-chop on how to take a PC power supply (ATX) and use it on your electronics bench as a clean source of DC power at 3.3V, 5V and 12V (and even -12V, actually). Let's start with a picture because I have a short attention span if there aren't visuals:

PC Power Supply Powering Breadboard

A word of caution: It's electric. Don't be stupid. The Dell power supply pictured above us hooked up to mains power and can supply your circuits with upwards of 14A at 3.3V, so, again, don't be stupid. One cool feature of this Dell (and I'm sure of many ATX supplies) is that it will instantly shut down when you short things out. That might be advice from experience. No sure.

When snipping wires and protecting the ends and whatnot, BE SURE THE POWER SUPPLY IS DISCONNECTED FROM THE WALL OUTLET! As with any of the silly things I build, if you imitate me, you do it at your own risk and I warranty NOTHING on this site, from instructions to ideas to schematics to whatever. Nothing. I've worked around the guts of PC's since the IBM XT days and I'm here to talk about it, so it must not be that scary.

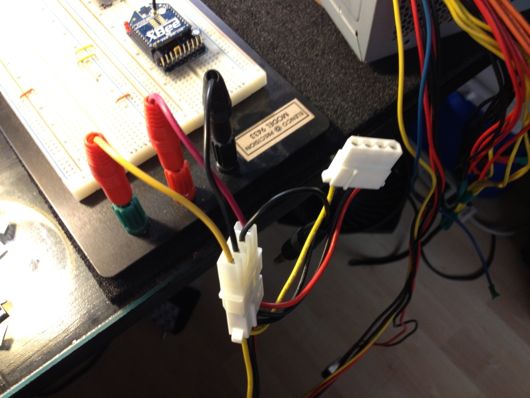
Throughout this article, as with most of my articles, please forgive me for not knowing the nomenclature of connectors and parts. That said, I rigged up a 4-pin Molex connector with banana kinda connectors that slip into the tops of the power connectors on a standard breadboard. This makes it really easy to connect 3.3V, 5V or 12V to my breadboards.

4-Pin Molex with Breadboard Connectors

Usually, I wait to worry about the "how" of a power supply for a circuit until I get the core of the circuit working, so a quick supply of the standard voltages is nice. Plus, with an ATX power supply, I can get upwards of 10 amps or so. For instance, I've been working on a circuit that controls a sealed environment's temperature using a thermoelectric cooling device ("TEC") and at upwards of 15VDC, it will want to draw about 3A. My benchtop digital power supply can barely make that. The ATX supply, on the other had, does it handily.

Why did I choose a PC power supply and not just keep using my digital benchtop one (aside from the amp draw on one of my experiments)? I found that I was almost always setting the supply to 3.3V, 5V or 12V. Crazy how the PC supply does all three of those.

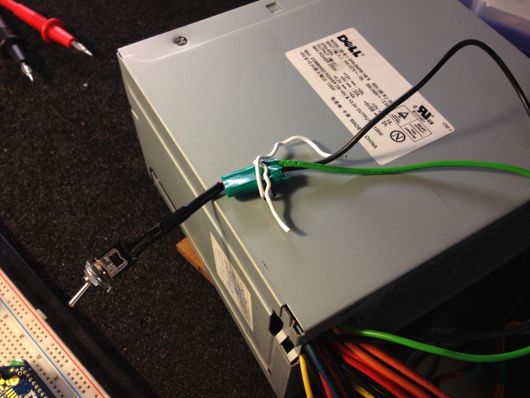
To turn on and turn off the power supply easily, I connected a switch between the ATX 20-pin main board connector's pin 14 ("PS_ON") and one of the ground wires:

ATX 20-Pin Molex Connector Pin 14 is PS_ON, So Add a Switch

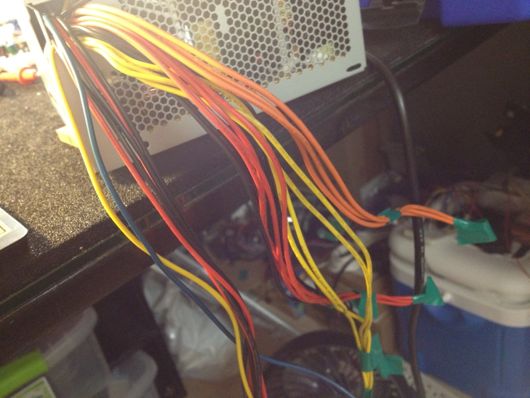
Any other wires from the 20-pin connector were cut back,taped off and tucked inside the power supply's enclosure for safe keeping. I kept all of the many 3.3V (orange), 5V (red) and 12V (yellow) wires full-length and ready to be connected to my future screw terminal block that will sit conveniently on my bench for quick hookups.

Ground (black), 3.3V (orange), 5V (red) and 12V (yellow)

The dark blue wire is -12VDC and is handy to have for amps and stuff, so keeping that one handy, as well.

I'll add more to this post once I get the screw terminals finished.

meltmedia Hack Day July 2012!

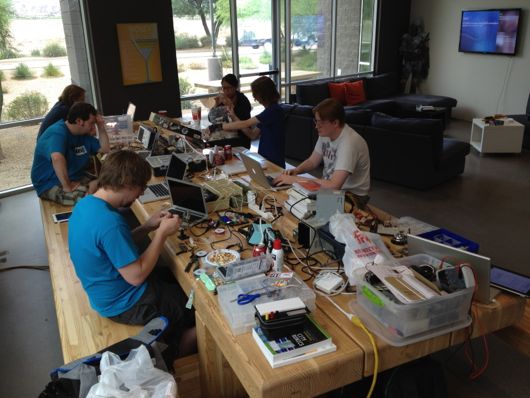
I work for an amazing company that has an equally amazing culture: meltmedia, in Tempe, Airzona. Those without a sense of humor need not apply. We do things like company outings in the middle of the business day to the movie theater to watch a cool movie opening, drive-by Nerf® dartings, and amazing company holiday parties. meltmedia Hack Day July 2012 participants

Last Saturday, I organized a hack day. I emailed the entire company and encouraged them to purchase Arduinos and Arduino kits or to bring whatever projects they might like to spend a Saturday with friends and coworkers working on. It was a ton of fun. I think everyone who attended had a great time, as well. Cool things were tinkered on.

I figured out how to mobilize a good majority of my electronics workbench and tools and brought them along to the office. We have a massive custom-built table in the kitchen that's perfect for a bunch of hacking stations, surge strips, computers, wires, LEGOS®, food, etc. We had two oscilloscopes, a few digital multimeters, quite a few Arduinos, lots of breadboards, tons of wires, many passive components, and great learning experiences.

We blew up one of my 24-outlet surge strips, sadly. When we opened it up, one of the traces on the main PCB inside was completely evaporated. Impressive, since I had NOTHING plugged into it. Other than that, I don't recall smelling or seeing the magic blue smoke at all. Pretty impressive for a bunch of amateur electronics geeks!

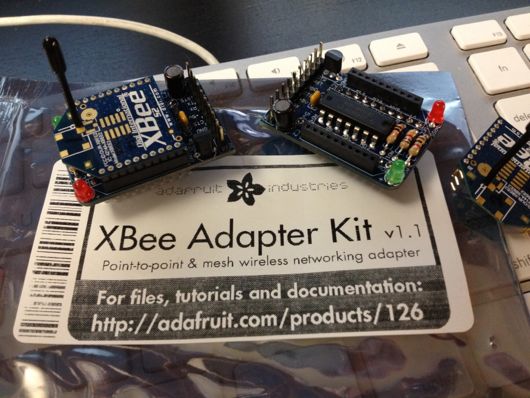
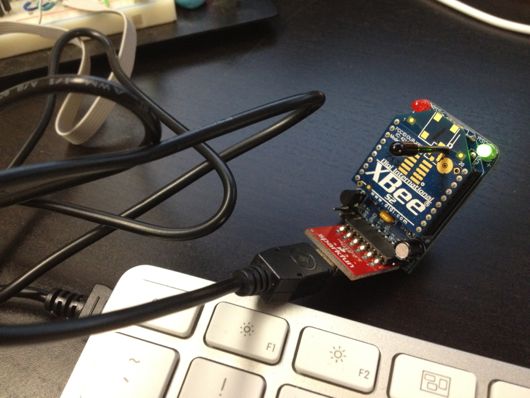
So, what was my hack day project, you ask? I built my two Adafruit XBee Adapters:

Adafruit XBee Adaptor

If you do any work at all with the Digi International XBee radios, these adapters are a must, for sure! They're super easy to put together and both of my work perfectly. I have two different Sparkfun FTDI Basic breakout boards that I use to connect the XBee adapters to my computers to make magical invisible serial cables. You can also use Adafruit's FTDI Friend, which is kinda the same thing. It's fun to chat with CoolTerm (or pick your favorite serial terminal program) using these XBee modules. It's ridiculously easy to set them up. I read and often reference the book, "Building Wireless Sensor Networks" by Robert Faludi for my Zigbee projects. If you haven't had a chance to try them out, order some from Adafruit, Newark, Mouser, Sparkfun or Digi-Key and get one or two of Adafruit's adapters to make talking to them super-easy. The FTDI Basic modules from Sparkfun are a good idea, in general, as well.

Here is one of the Adafruit adapters connected to a Sparkfun FTDI Basic connected to a USB cable connected to my iMac's keyboard USB port:

Adafruit XBee Adapter + Sparkfun FTDI Basic + USB cable

I've done at least one other article in the past about the XBee stuff, so if you want some starter ideas, you can search the site for XBee or Zigbee. It's fun to go wireless.

If you can, I highly recommend organizing a company hack day. It's a load of fun and a great way to build camaraderie. Plus, at a company like meltmedia, we may even add more interactive hardware to the offices, like a new edition of iPotti!

AC Current Detection with Allegro AC756 Linear Current Sensors

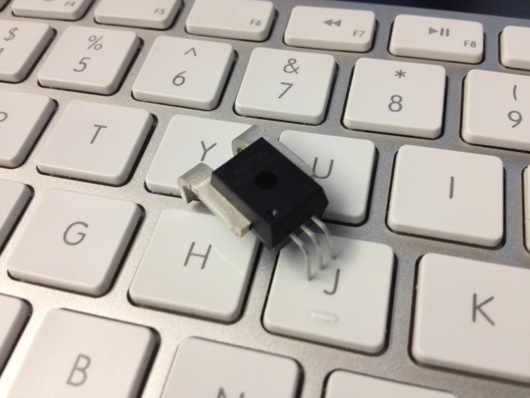
I received an Allegro AC756KCA-050B from my friends over at Element14 (Newark.com) and I wanted to see if this little gadget would make it easy to sense when the doorbell was ringing. As it turns out, it's completely overkill for the task, so I won't use it for my remote brass marine bell door chime thing (mentioned in previous articles). BUT, I did want to experiment with it to see what I could get from it. This is the true story of how I got something useful out of it and how I manage to have fun playing with electronics while being a complete hobbyist. First of all, here is a picture of one:

Picture of Allegro ACS756KCA-050B AC Current Sensor

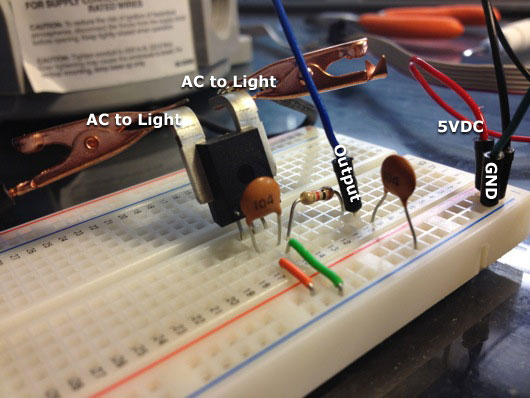
It totally looks like a micro robot that pierces the fingertips of cheating poker players. You don't see that? OK, maybe the the first things you notice are those big-ass leads at the back. Why so big? Because the datasheet says this bugger can handle up to +/- 50 A of current. Wow. The next thing I noticed was the dot in the corner of the face of the chip. I blame A.D.D. I'm guessing that most people would notice the three little leads (or fingertip piercers). Those leads (from left to right, 1 to 3) are Vcc, GND, and Viout. The output side (non-AC side) runs on 5VDC. With a couple of capacitors and a resistor, it's ready to go. Here's what my little test rig looked like (I labeled it because I am proficient with Photoshop) (no, for realz: I'm pretty good with Photoshop and I can do more than labels with drop shadows):

AC756KCA on Breadboard

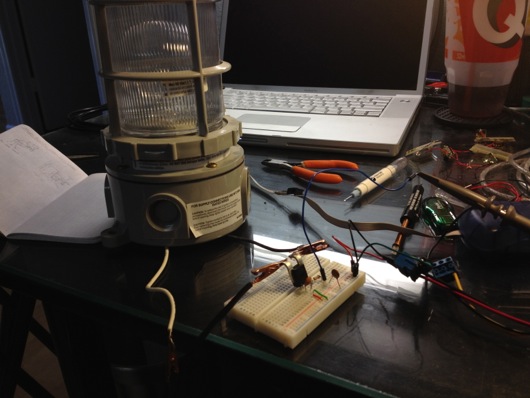
When our office expanded AGAIN, we bought a new space that had some cool "jelly jar" light fixtures that were left behind (my electrical supply sales friend told me that was what they're called in the industry). I got a couple of them for fun. I might put a red LED light inside one and mount it above the Man Cave™ door to warn my wife of experiments in progress. Here is the lightbulb connected to the ACS756:

Lightbulb Connected to ACS756 Current Sensor

The first thing I did was hook the output of the ACS756 to one of my AVR microcontrollers. When I read the values via an analog (ADC) input on the AVR, I printed the values every second to the terminal and saw values generally around 510 (on a scale from 0 to 1023). At first, before I turned on my brain, I couldn't figure out why I was only getting that one silly value (or close to it), regardless of the state of the power switch on the lightbulb. What I failed to realize was that the signal coming from the device was an AC wave, of course. I needed to sample a bunch quickly and then plot that out to see the wave.

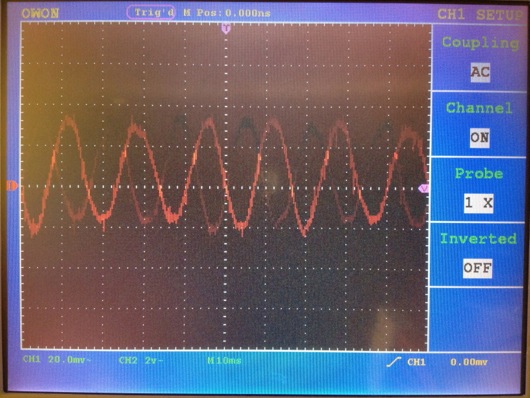
Next, I connected the output to my oscilloscope. I was able to see a waveform when I powered on the lightbulb. It was a bit more faint than I thought it would be, probably because I hadn't read all the way through the datasheet at this point. I guess an op amp would take care of that if I wanted the wave a bit bigger. I set the scope to see if the frequency was 60 Hz and it looks like it was (60 Hz, 16.7 ms each cycle). So, I assumed that was a good read from the AC current side of the chip. Here's the scope screen with the lightbulb turned on:

Scope: Lightbulb ON

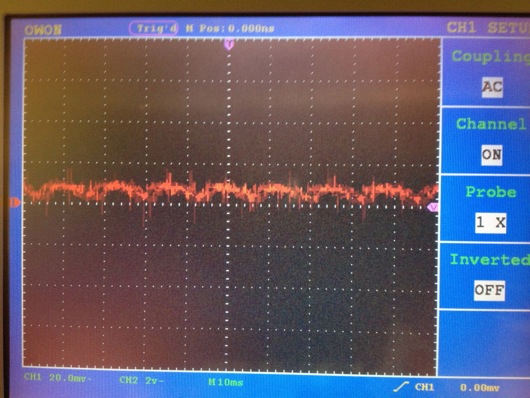
With the lightbulb turned off, the waveform looked like this:

Waveform of lightbulb while OFF

When I turned off the light, the wave went to nearly gone, but, as you can see, some kinda transient something or another caused a tiny little flutter in the scope display when the light was off, which I suppose could be controlled if I read the datasheet more intently. When I turned on the lightbulb, the wave was definitely there and there was most definitely a difference.

Now, as I said in the beginning of this article, my original intent for this device was to sense when the doorbell line was energized and ringing the chimes in the house so as to trigger a Zigbee wireless call to a remote device on our back patio which would then fire a solenoid at a brass marine bell. I think I've said it before in a previous article: Yes, this is total overkill and I could easily run to Home Depot or Lowe's and get a remote doorbell to hack and have it running in a couple of hours. But, where's the fun in that??

RoboStocking - AVR, Servo, Motor, IR Sensor, and BOOM!!! Merry Christmas!

At the office, we decided we were going to have a stocking decorating contest for Christmas. The rules were pretty lax, so I immediately thought of interactivity and electronics and blinky lights and whatnot. Well, that, and there was no way in you-know-what that I was going to hot glue glitter and spongy letters to a stocking with electricity being involved. Here is a video of the final product to pique your interest:

How did I do it? Easy. Some AVR programming (through my usual Arduino hackery) and some simple electronics and BOOYAH! Motion activated stocking with a Santa sign and some jingle bells.

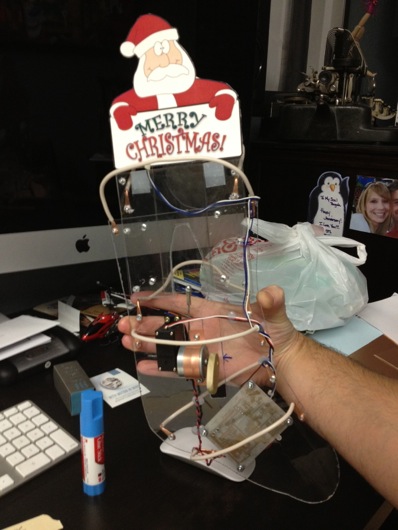
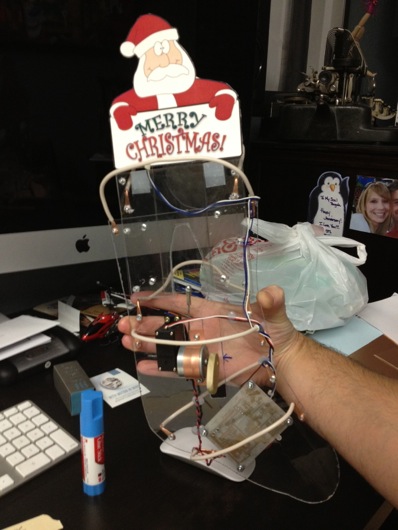
First step was to make a framework to hold the mechanics and the electronics. I used plexiglass and Lexan to support the pop-up Santa sign and to act as the general body of the mechanical works inside the stocking. The layers of plastic were riveted together.

RoboStocking plastic frame and copper ribs

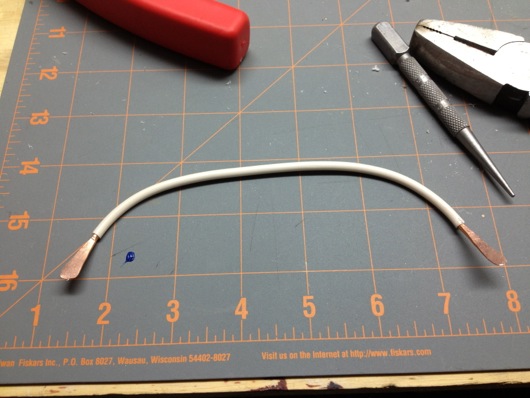
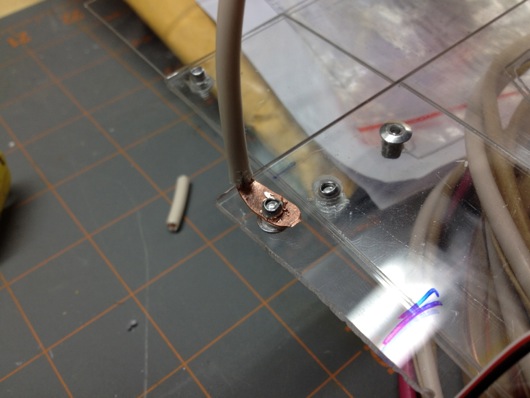
To push out the stocking into shape to make room for the guts, I took extra heavy gauge copper wire I had in my electrical drawer and used pieces of that for "ribs."

Heavy gauge copper wire as ribs

Copper rib bent 90º and riveted to main plastic frame

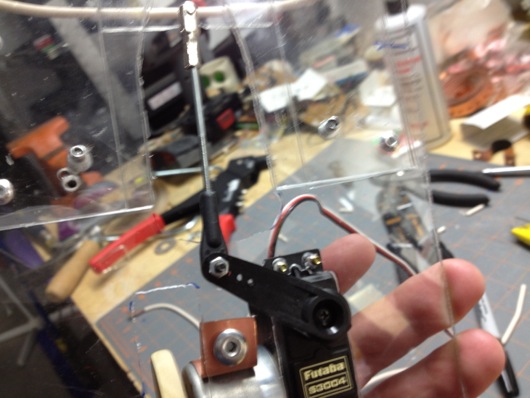
The sign was pushed up out of the stocking with a regular hobby servo and some armature work. The plastic worked as a track to keep in straight and sliding smoothly. The armature was made from parts used in RC airplanes I got at a hobby store.

Servo Santa sign linkage

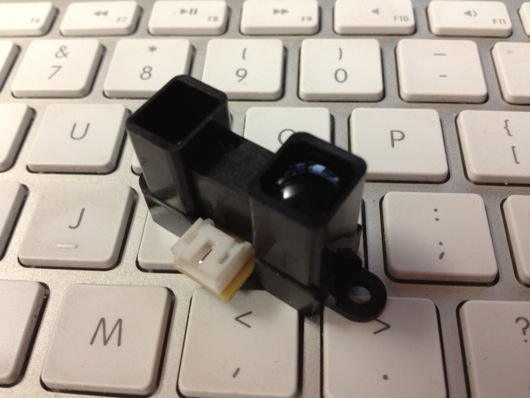
The next thing was to make it motion sensitive. That was initially going to be controller by a PIR sensor, but it turned out to be too whacky. I settled on a nice little sensor by Sharp that I picked up at Sparkfun.com. They simply alter a voltage depending upon what's in front of the sensor and how far away it is. Really simple to experiment with and get a good idea of what numbers to expect from the ADC to trigger the action.

Sharp Long Range IR Proximity Sensor (2Y0A02)

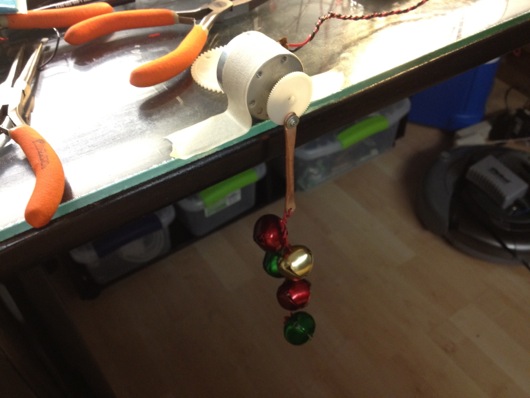
I tried a number of methods for jingling bells. The first was funny, but a bit difficult to implement on the sticking itself. It involved a wheel (or plastic gear, in this case) and a rod with the bells hanging off of it. The idea was that the motor would push and pull the bells rapidly and make them jingle. It worked on the bench, but not in the stocking.

First attempt at mech-jingle bells

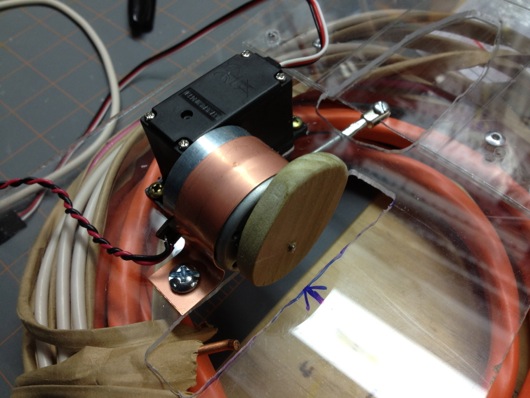
The ultimate solution I stuck with was simply a cam on a motor behind the bells. When it ran, it smacked the back of the front face of the stocking where the bells were hanging. It was essentially a big honking 12V phone vibration motor.

 Wood cam that vibrates jingle bells
Wood cam that vibrates jingle bells

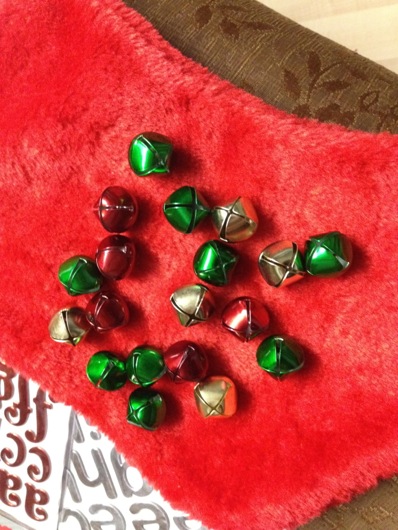
Next step: Jingle bells. I tied them to the cheap Chinese-made stocking with thin copper wire as a sort of twisty-tie thing. Worked great. I wasn't very organized about where I put bells, just wanted to get a bunch in the general vicinity of the bell thwacker motor.

Jingle bells randomly stuck to the stocking's face

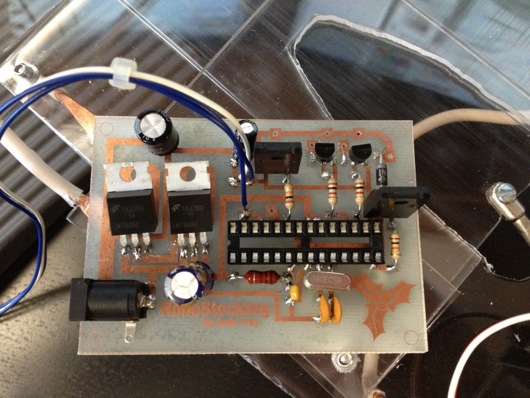
The brains behind all of this is, as usual, an AVR microcontroller. I use my own version of the Arduino IDE to upload firmware to my AVRs on the breadboard. The code is super simple. It basically just waits in a loop for the ADC to show a value from the IR sensor that meets whatever threshold I figgered out in my experiments with the sensor and ideal distances for triggering the sticking. When it gets a hit, it turns on the MOSFETs for the servo (the sign) and the motor (the bells). It start the motor spinning for hitting the bells and pushes up the sign. After a few alternating blinks of the [not-added-at-this-time] LEDs, it retracts the sign and stops the motor and cuts power to them both. That's pretty much it. Here's the RoboStocking motherboard:

RoboStocking motherboard with socket for ATmega328 microcontroller

I even put holly on the board in the etch. :) Because the wall wart that powers this thing outputs about 20VDC, I put a LM7805 5-volt regulator on the board for the logic stuff and another LM7805 regulator for the motor and servo. There was no reason to run the motor at its full 12 volts. It was only smacking the back of the stocking. There are two regulators because the power draw of the circuitry plus the motor plus the servo was causing the AVR to shutdown. Running on their own circuits gives them each the full power available through the individual regulators.

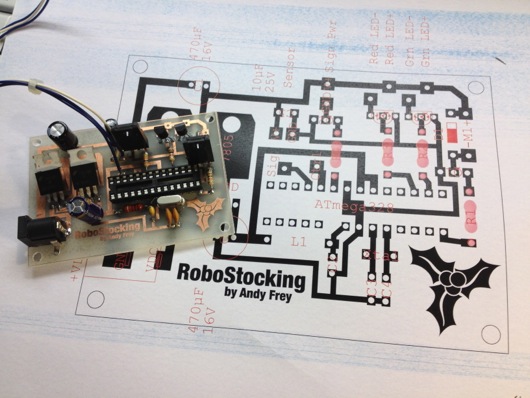
As always, I drew the circuit board in Adobe Illustrator, flipped it and printed it on my Samsung black and white laser. I've found that running the transfer paper through the laminator four times makes the toner really adhere to the copper without problems. I've notice that after four times, when you drop the board with the transfer paper stuck to it into the water bath, it dissolves off the board pretty quickly. The etch afterward is much higher precision, as well.

Board with printout of circuit to help me place components

The only thing left was to draw a cute sign for the slide-up. It took me a bit of trial and error, but I finally drew a decent cartoon Santa in my normal style and slapped a Christmassy looking font in the sign part of the slide-up thing. This setup makes it look like Santa is just hanging out in the top of the stocking. When he slides up, the actual sign is revealed below him, as if he's pulling it up for you.

Santa sign on RoboStocking

With everything assembled, the guts of RoboStocking look pretty cool:

RoboStocking with SantaSign and RoboGuts

What makes this story funny is that I was not able to finish this silly thing in time for our company Christmas party. I had to put the final touches on it over the weekend and bring it in the Monday following the party. It was met with great reviews, but could not win the contest that had past. :( Oh, well. There's always next Christmas. Sound and lights will be added, I assure you. ;)