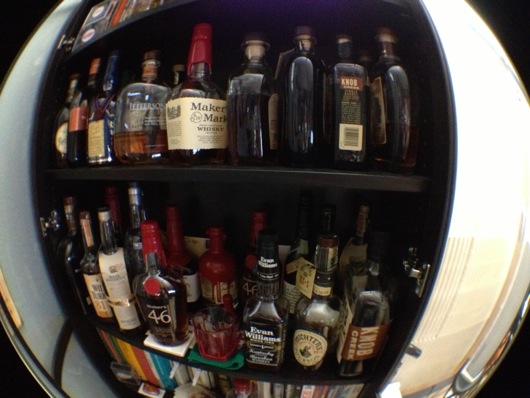
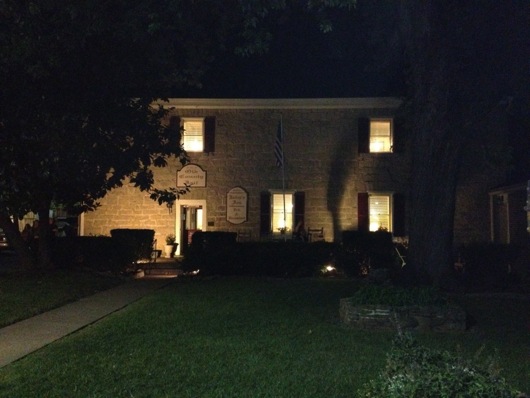
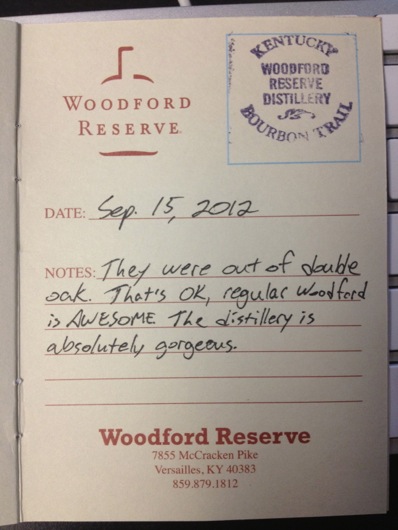
I put together a guide pamphlet for our group's annual trip to the Kentucky Bourbon Festival and for the Kentucky Bourbon Trail. It included quite a bit of collected and learned information on my favorite adult beverage: Bourbon. Here's the page that contains the "Bourbon To-Drink" checklist, if you're interested! I thought I would reformat it a little and put it in a blog entry.
Charlieplexing LEDs with an AVR ATmega328
How many times has this happened to you? You have a little LED project with an AVR ATmega328 microcontroller (or Arduino) at its core and you need to light up a boatload.... A dingyload of LEDs. Maybe it doesn't happen a lot to you. It's happened on three recent projects for me. My latest two LED projects are a timekeeping piece that illuminates 21 characters from behind and a simple LED chaser thing.
As usual I wanted to keep the component count down on these projects. I also tend to prefer not to use a ton of ICs with busses between them and whatnot, if I can help it. So much darn soldering and stuff. Meh. Luckily, back in 1995, so the Wikipedia story goes, a super-smart dood named Charlie Allen at Maxim Integrated devised a super-ingenius way to control a large number of LEDs using a not-so-large number of microcontroller pins. The method is called, "Charlieplexing" and it seems a but daunting, at first, but it's not that bad once you figger it out.
Standing Desk Improvisation Inspiration with Little Perspiration
Today at the office, I walked by a coworker's desk and something was different: She'd put an Ikea table and shelf together and set them on top of her desk. Nutty, at first glance. Purposeful, after 0.25 seconds of thought. Here's the story of what I saw: Inexpensive IKEA furniture repurposed for other ingenius uses.
meltmedia meltHack-A-Palooza V: The Lost Pushbutton
Every few months I organize a hack day at the office, usually on a Saturday. This past Saturday we had our 5th installment of hack/make/tinker day at meltmedia and the turnout was great! Attendance was 8, up from 3 the last time around. YESSS!
Electronics Workbench LED Upgrade
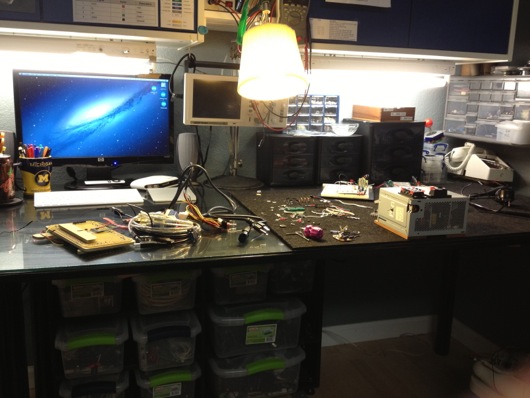
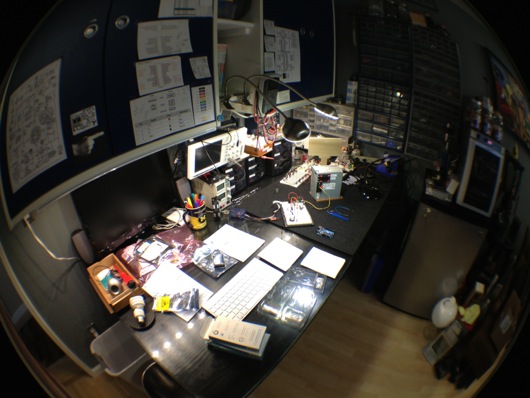
I guess I forgot to post an update to the update of my workbench. Not only did I clean up the gigantic mess that had accumulated on it, I improved the lighting and workspace availability:
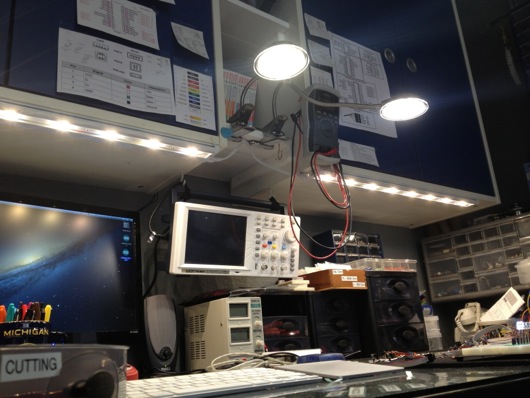
Prior to this upgrade, I had fluorescent lighting under the blue cabinets over the bench. They extended down about 3 to 4 inches and kinda got in the way. I also didn't think through the placement, so they were back about half-way under the cabinets. This meant they didn't put light out on the front edge of the tabletop like I would have hoped. Here's the old lighting:
The monitor on the left barely fit behind the light and the light extended down lower than the top of the monitor. Dumb. I might have been drinking bourbon that day. Like, more than a shot or two. No matter. That is history. Today, we have wonderLEDs!
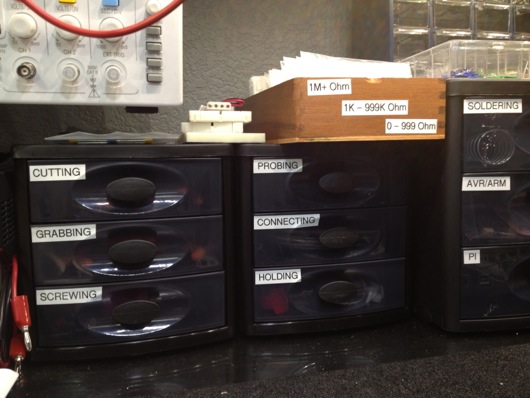
Also, notice I suspended my oscilloscope above the desktop. It freed up quite a bit of desktop space. I added some more plastic storage drawers to organize my tools and miscellaneous other parts that usually wound up spilled all over the work mat. I labeled the drawers for quick searching and fun:
I believe I found those at Target. They were inexpensive and they work very well. They have little rubber footies to keep them from sliding around on the glass tabletop when opening and closing the drawers. As you can see, it's easy to tell what's in each drawer... If you're me. My wife needed a few seconds to interpret the labels in order to find the scissors. Scissors cut things. They're for, "cutting." BOOM! Easy-peasy lemon squeezy.
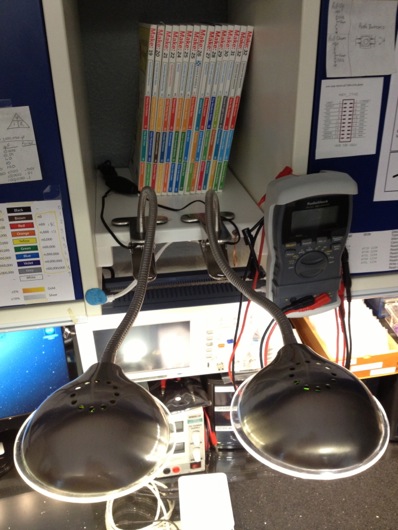
I picked up the two LED bars under the cabinets and the two gooseneck LED lamps at Lowe's (maybe Home Depot, can't remember). All told, I maybe spent $100. The best thing about the bars is that they're quite flat, leaving plenty of headroom for monitors and whatnot. The two flexible lamps clamp onto the little shelves I built between the cabinets:
These are about $20 each. They put off great light, stay cool and I can point them individually to light a component any way I like.
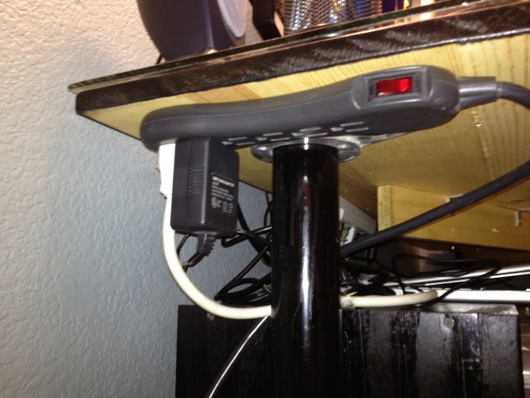
I set up the power to go through a single multi-outlet toward the back and under the ledge of the workbench table top (please excuse the fuzzy photo):
It's an easy reach to turn the lights on and off. The two gooseneck lamps have their own switches on the shelf above, so it's easy to switch them on or off without taking down all the lights.
iPhone Lens Adapters from Photojojo
I've seen a few different add-on lenses for iPhones out there and decided to nab a set for myself to make my detail photos and product shots a little more neato. I went with the Photojojo three-lens kit for $49 US.
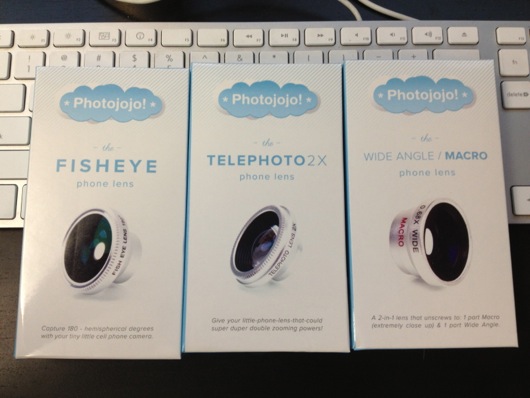
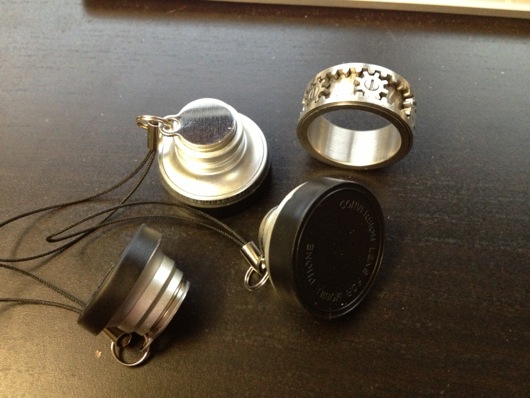
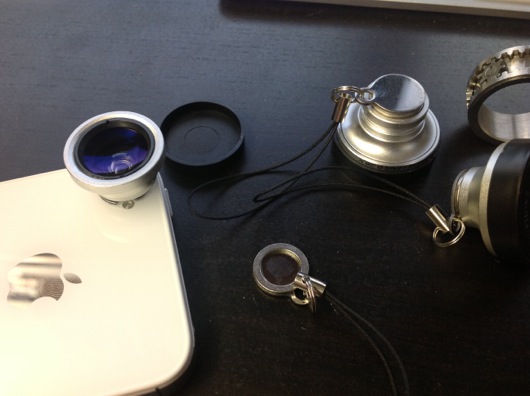
These lenses are just little guys. They come with front covers and magnetic back covers that double as little string handles.
Kinekt Design Gear Ring not included.
The lenses are tough little buggers. Appear to be made from aloominum (or Al U. Minium, if you're from Canadia, eh), or something like it. The black front caps are flexible plastic and the backs with the little handles are magnetic metal something something. Quality is nice and the glass appears to be very clean and clear. My telephoto lens did not ship with a fingerprint. I had to accidentally add that myself. It was easy to clean off with a standard microfiber cloth.
Since the camera on my iPhone 4s isn't a solid replacement for my Canon DSLR, I'm not going to tell you this is an ideal replacement for a good DSLR setup. For any sort of high-end product shot or landscape or anything other than fun or convenient photo making, stick with your expensive lenses and DSLRs. For the stuff I do for StuffAndyMakes.com, like videos of blinky LED circuits and little motorized this and thats (and occasional bourbons), it's plenty OK. These lenses give the iPhone optics a little help in its range and that's it. Not super fancy. Good for a measly $49.
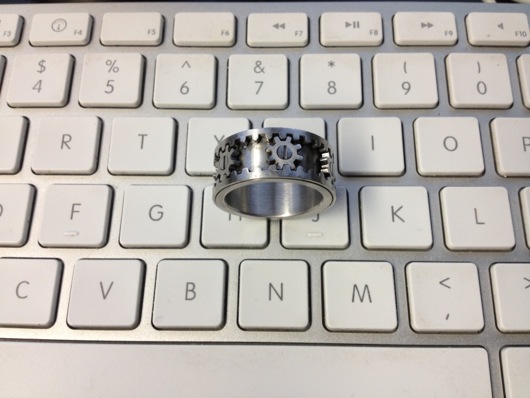
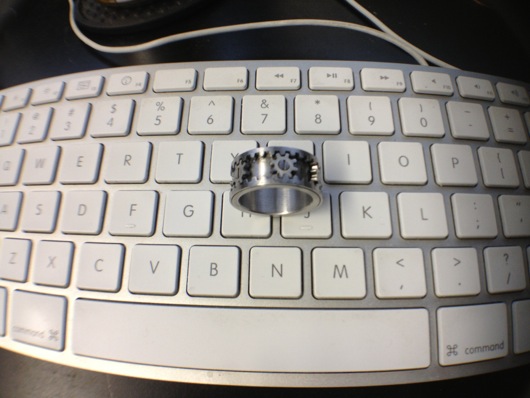
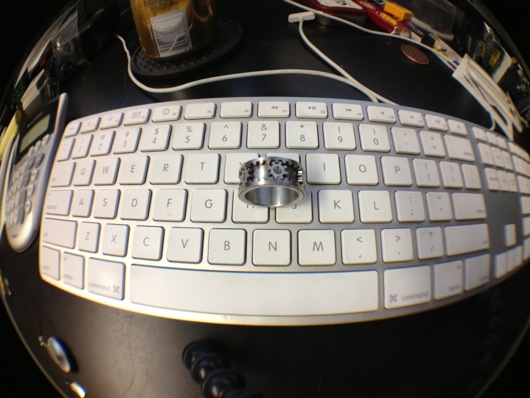
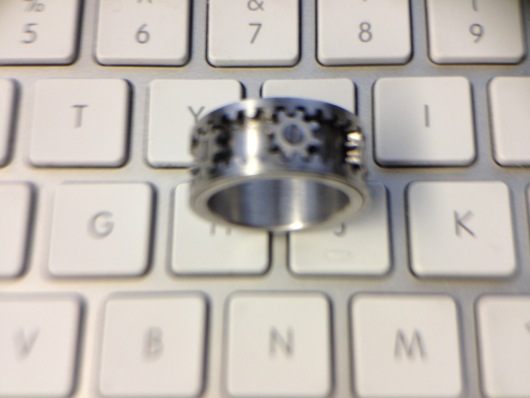
Here are some samples of each of the lenses from the same distance imaging the same object (my favorite gadgety ring of all: The Kinekt Design Gear Ring):
Yes, the ring was dirty between the gear teeth. I was too lazy to clean it. Which, by the way, I've found is best done with good old antibacterial foamy hand wash stuff. Get a bunch on the ring and spin it a while. Rinse with water and repeat one or two more times. Works 100% of the time every time. Makes the ring spin freely and happily.
You can see the telephoto is useless as close as I had the camera, but I figured I'd show it to you anyway. It seemed similar to the way the video mode of the iPhone camera looks. A bit zoomed in compared to the regular still photo shot.
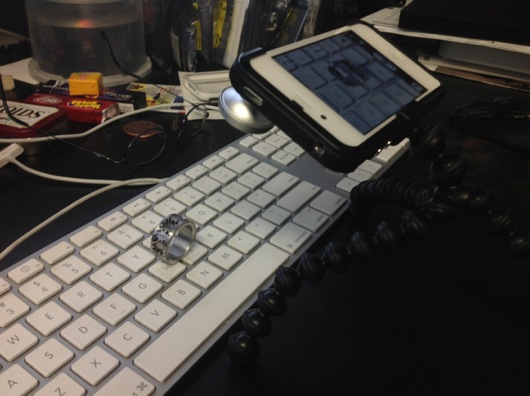
The lenses are small, like I said above, and they are magnetic on the back. This allows them to stick to the self-adhesive ring on the phone, which comes off of the phone without leaving a mark. The little string handle/back cap is also magnetic and keeps the back of the lens nice and clean.
Here is one of the lenses on the phone:
Here are some more sample photos:
The macro is the one I'm most interested in, since I do a lot of close-ups on components and stuff. The fisheye is fun, but otherwise useless for me. The telephoto is cool, but I doubt I'll be carrying these around with me very often. They're stuck to the face of my man cave beer fridge next to my electronics workbench. They're conveniently accessible there and that's likely where they'll spend most of their days.
Home-Aged Bourbon YUM!
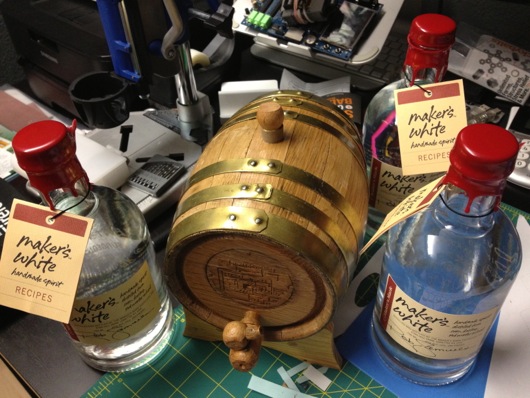
While wandering around at the 2012 Kentucky Bourbon Festival, I stumbled upon the Bluegrass Barrels tent. The guys there showed me how easily white dog (moonshine, or corn whiskey before it goes into the barrel to eventually become bourbon) can be aged at home in your own little charred oak barrel. Is that awesome or what??

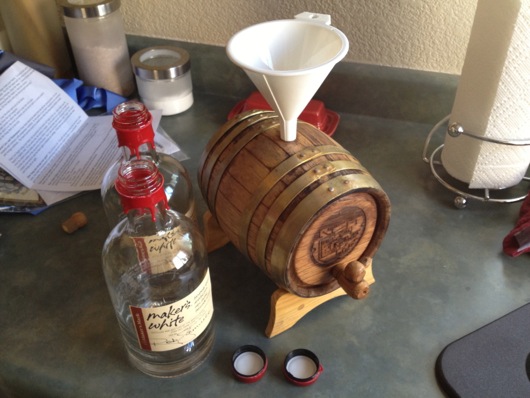
So, first thing you do is get some white dog. I got mine at the Maker's Mark distillery in Loretto, KY. You can only buy this at the distillery. It's called, "Maker's White" and it's basically moonshine. It's not quite as funny-car-fuel as moonshine, but it's still genuine corn whiskey that has not aged a second in a barrel. I think it's tasty. Other's who've tasted it in my man cave don't agree. More for me.
The tastes kinda reminds me of those delicious corn bread biscuits you find at some restaurants. It's like a liquid version of those with alcohol bite.
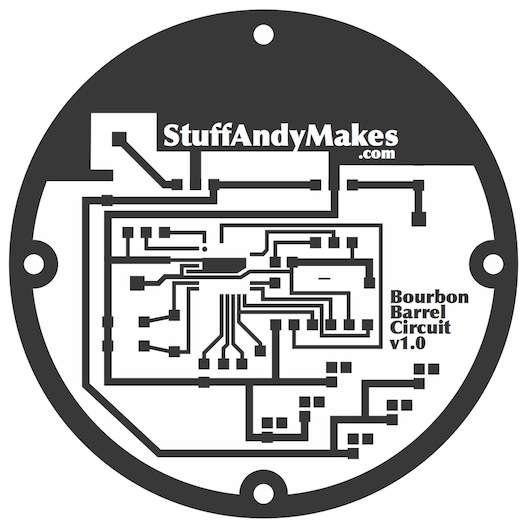
You can order your Bluegrass Barrel with your own logo laser-etched onto the barrel head. I ordered mine with an image of the circuit board for my wife's LED mood lamp, except that I changed it up a bit to be more like an advertisement for this blog.
As per the instructions from Bluegrass Barrels, I soaked my barrel. I think I actually left it in the sink for two days. This seals up the barrel nice and tight so the angels don't get too much of a share of your tasty bourbon.
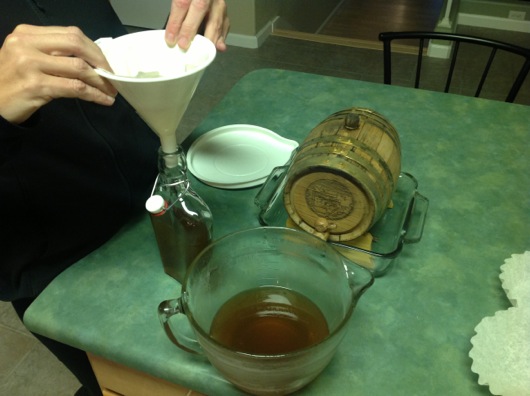
Once it was soaked well enough, it was time to load it up with yummy white dog. I just grabbed a funnel and poured until it was full, trying not to waste a single drop in the process. Some of it was lost to the Andy's Share. Part of the process.
Now sing that 1970s "Anticipation" song from the ketchup commercial over and over again. Sing it for as long as you want your bourbon to age. I let mine sit for about 14 weeks or so.
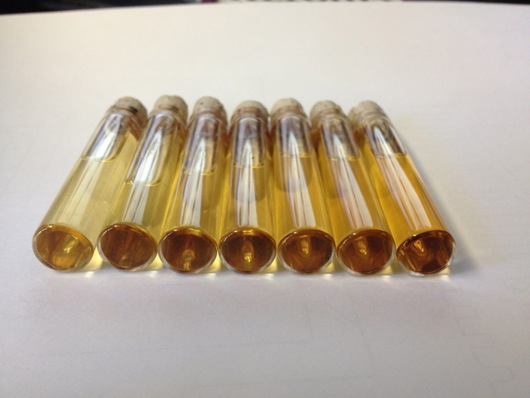
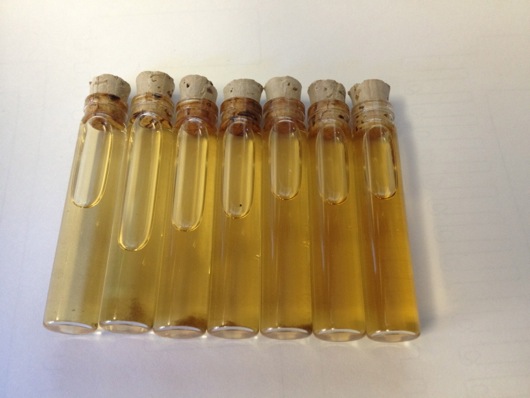
I sampled the potion every two weeks. To store the samples, I ordered some little glass vials with cork stoppers from Pilot Vials on-line. They were really inexpensive and I got a ton in one box. Here are the samples in order from left to right (2 weeks, 4 weeks, etc.):
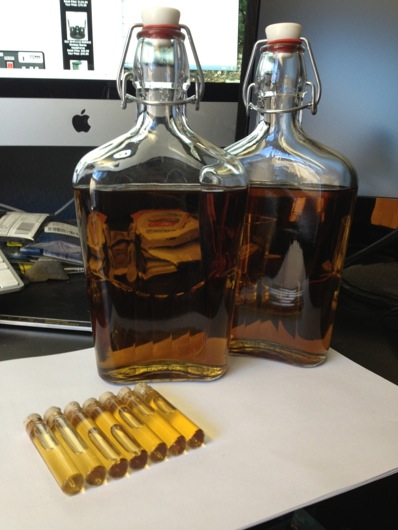
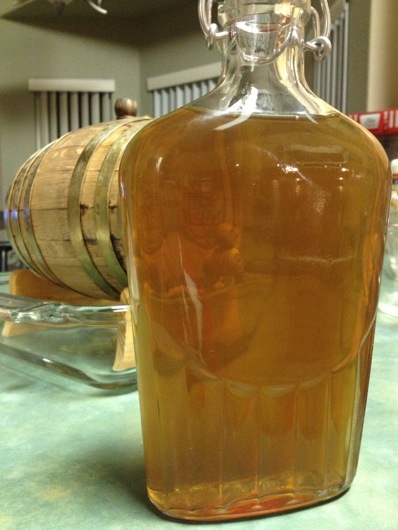
You can see the progression from lighter to darker. It was amazing to watch. Sadly, I have little if any patience, so 14 weeks it was. I bought a couple of glass flasks at the Container Store.
The final product was pretty awesome, but just a tad harsh, so I cut the bourbon with just a bit of water to taste.
In hind sight, I would not have done that. It clouded up the bourbon. The taste was totally fine, just a bit cloudy. So, I searched around and found that this could be rectified by "chill filtering" the bourbon. I'm not exactly sure that I did it correctly, but according to what I read, this involves chilling the bourbon to about 27°F and then filtering it. Chilled it in the freezer. Next, I filtered it through coffee filters. It was all I had handy.
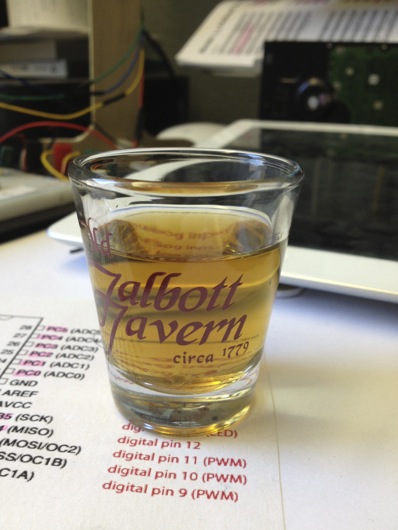
This took some of the cloudy out, but it was still not clear brown liquid, like the real brands. But, after I let it sit and warm up, it seemed to clear up for the most part. It turned out to be quite delicious, regardless. Here's a shot glass from a place that I'm sure none of the visitors of the Bourbon Festival know anything about:
Apparently I'm using an AVR/Arduino pinout chart for a coaster in that photo (nerd funny). If you grab some moonshine or white dog from somewhere, I highly recommend you stash some in a Bluegrass Barrel or similar storage device and age some yourself to bourbon perfection. Even if it doesn't turn out to be as top-shelf as your favorite top-shelf, who cares? You aged some yourself and it will feel cool to say you did. You can always pour the not-so-great batches into Jack Daniel's bottles for mixing. ;)
Lipstick Camera Turned Video Microscope
Backstory: In a previous life, I was a freefall photographer. I took photos and shot video while skydiving. Before GoPro and others started popping up on the scene, I had devised a little rig for shooting freefall video without the need for the bulky miniDV camera on my helmet. The setup used a "bullet" or "lipstick" camera which provided a video input signal for a miniDV camera (used as a tape deck at this point) located OFF my helmet and in a pouch under my jumpsuit. I don't remember where I got the camera. They can be found on the InterWebs for $100-ish, maybe less. Anyhoo, if you've ever stuck your hand out of the window of a car moving at highway speed, I'm pretty sure you'll be able to figure out how non-aerodynamic a miniDV camera is. Needless to say, a lipstick camera cuts through the wind WAY easier than a full-on Sony TRV-20 miniDV camera. A lipstick camera also weighs considerably less than a miniDV camera.

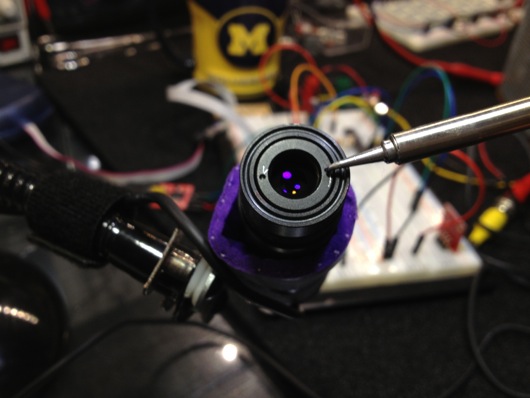
OK, now that I've barfed out a giant intro paragraph, let's get to the nutty-tasting inside of this story: I have this lipstick camera sitting around in a box. I know that when I twist the lens away from the sensor, the camera acts more and more like a video microscope. I have many tiny things I'd like to look at with minimal camera shake.
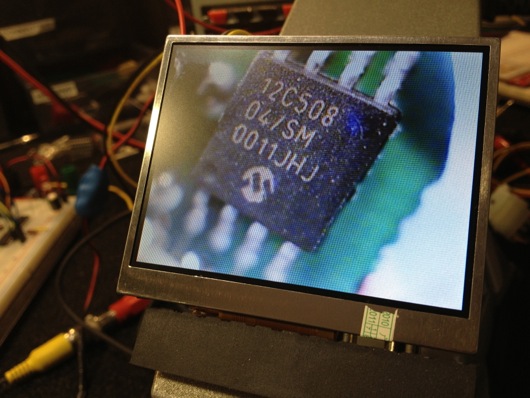
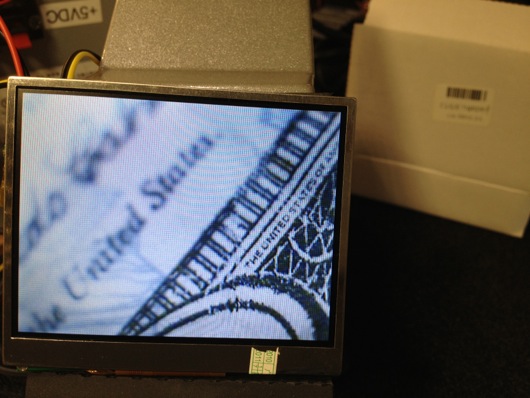
Neato. In fact, this thing is an excellent tool for reading the tiny, tiny lettering on tiny, tiny surface mount devices ("SMDs") on tiny, tiny circuit boards that I am studying. The problem is holding it steady enough and having a free hand (two is even better) to move around the object under study and take notes. (There are more samples at the end of this article.)
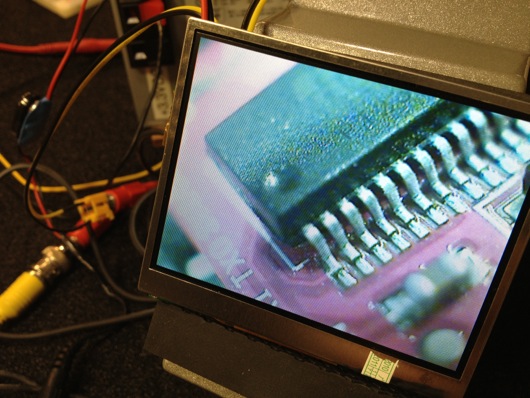
My eyes are pretty good considering the amount of time they spend staring at computer screens and my age, but occasionally I run across some parts or circuits where there is no way I can easily read the tiny print without magnification. The image above is coming from the lipstick camera and is being shown on a 3.5-inch NTSC/PAL TFT monitor I picked up at Adafruit Industries.
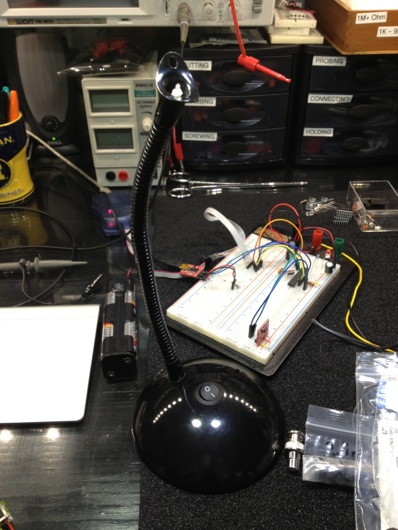
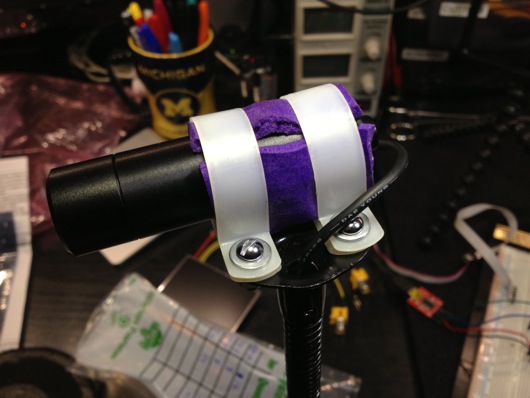
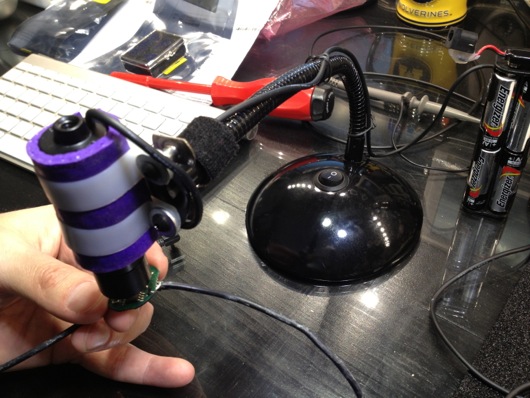
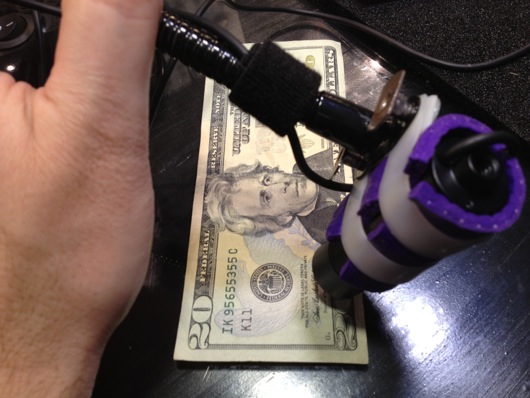
Holding the camera sounds like a job for a gooseneck from a cheap lamp. Thanks, Ace Hardware! Got one. $12. Unscrew some parts, gut some stuff and boom! Microscope camera stand:
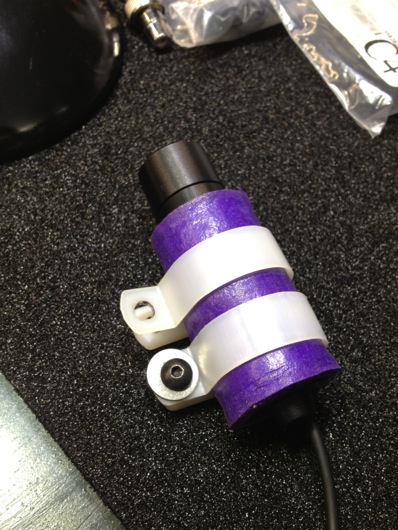
I repurposed some of the DIY mounting hardware I used to keep the little camera on my skydiving helmet. Two plastic brackets and some screws from Home Depot (as I recall) and a piece of yoga mat to grip it better, as it was flying with me through 120+ MPH winds.
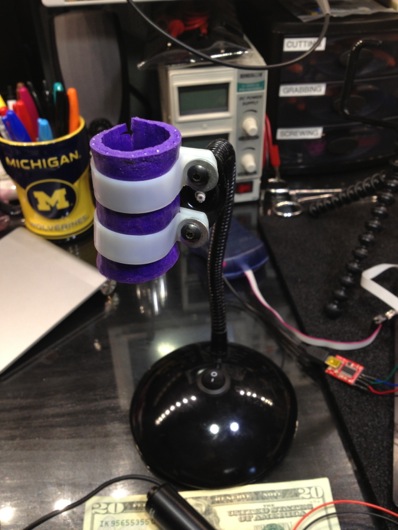
I adapted it to the gooseneck lamp by flattening the bracket on the end of the gooseneck and simply screwing the brackets into it.
That was attempt number one, anyway. I routed the cable for the camera, which includes its video signal and power wires, down the gooseneck. The power and video out connectors are routed out of the lamps power cord hole. I dug through my prodigious collection of random screws, nuts and washers and found some #6 pieces that worked like a charm:
Here are some things I looked at with my nifty video microscope:
The device pictured above was used on my skydiving helmet to turn the Sony camera on and off. I can't remember its name anymore. It was very cool. It had a multi-color LED that was fixed to my eyepiece for targeting the camera in freefall. I could get status from the camera, like when it was running low on fuel and tape. The single button make it super easy to work. Prior to devices like that, you had to have someone tell you that the red record light was on before climbing out of the plane.
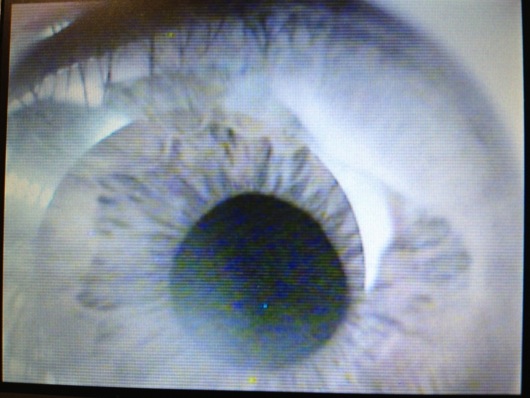
That image makes my iris look blue or grey, but it is in fact greenish-brown. Taking a picture of an LCD with my iPhone doesn't really keep a color profile intact, of course.
That resistor is a 1/4-WATT, regular old resistor you've put in a thousand projects. The little dood next to it is the tiniest SMD LED I've ever seen. I had purchased and bunch of those little guys for a clock project and had no idea just how freaking tiny they were until I got them in-hand. No. Way. On. Earth. ...Am I gonna figure out way to solder those puppies to something and make them work. Funny thing about that particular one pictured above: I had lost it for months. While I was putting this microscope together, it just showed up next to another not-quite-as-tiny SMD LED I was examining. I think it was stuck to the edge of the ESD foam on my table and just dropped off by coincidence. It's blue, if you're wondering. Intensely blue with 3 volts.
Currency is always fun to scope.
So, the next step in this project will be to make the LCD look nice and maybe conveniently mount it to the base of the scope. I dunno, yet. I have two of these little LCDs and each of them has two inputs. I might use the other one for a forward-looking camera on my RAM 1500 truck. Who knows?
2012 Kentucky Bourbon Festival
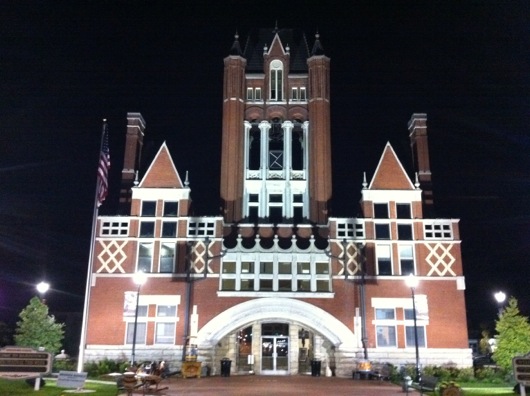
2012 was the second year I visited Kentucky for the Bourbon Festival. Just like 2011, it was a hoot. This time around (see my previous post) I was able to hit the entire Kentucky Bourbon Trail in one trip. The combination of the two made it that much more enjoyable. Because I was sloppy about taking photos this second trip, I am going to borrow some photos from 2011 for scenery, but not events. We wandered into town and as usual started in the Bardstown center of downtown to get our tickets and passes and whatnot. The building is beautiful and the people are friendly as can be.
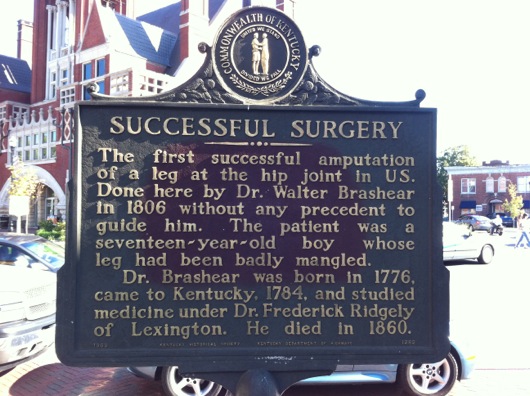
Also, this is a famous place, in case you were wondering and I'm sure you were:
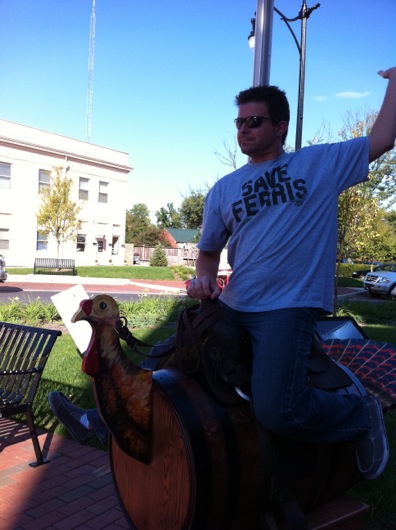
In 2011, I rode a turkey barrel.
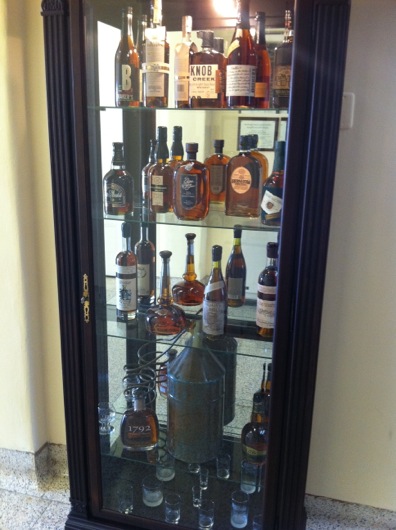
Oh, so many... YUM!!!
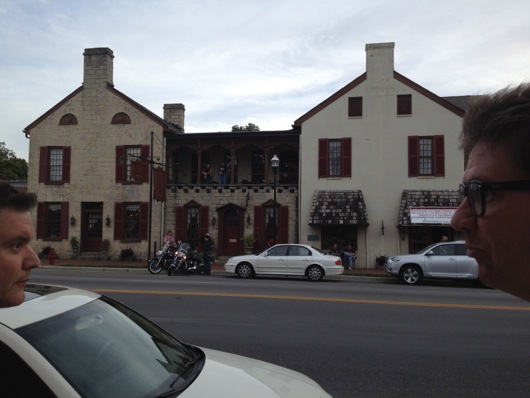
The first night at the Bourbon Festival, we always eat dinner at the Old Talbott Tavern, seen here flanked by chuckleheads:
While waiting for our table, I found my signature hat (supplants my signature University of Michigan hat):
For an appetizer, my buddy Ritch (right-hand chucklehead above) suggested Kentucky "burgoo." It's a stew-soup thing. It was absolutely delicious and I wanted to eat it the entire time I was there. But, I had to save room for bourbon, of course. Oh, and steak:
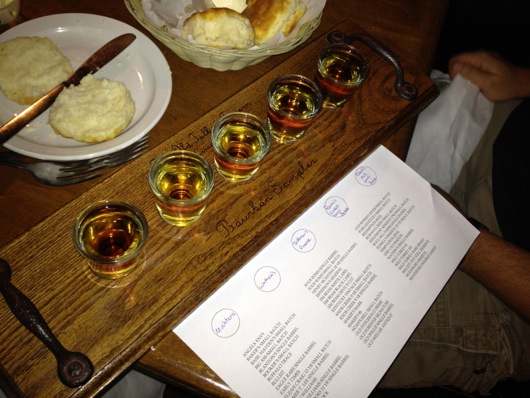
Throughout our feast at the Old Talbott Tavern, we were sampling bourbon, of course:
This year we sampled Michter's, Wathen's, Jefferson's Reserve, Rowen's Creek Small Batch, and Noah's Mill Small Batch. Every single one of them was delicious. The biscuits made great palette cleansers, too.
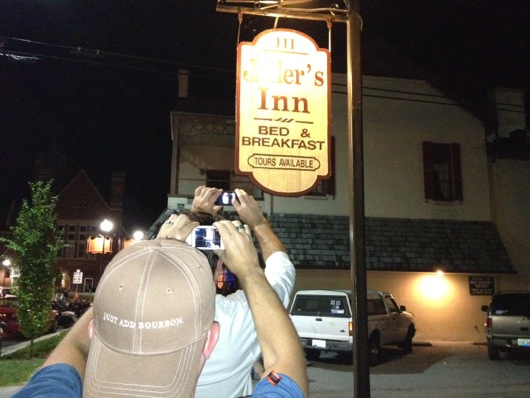
After dinner, in order to get to the main Bourbon Festival happenings, we walked past the Jailer's Inn Bed & Breakfast. So, we took photos.
And we took more photos...
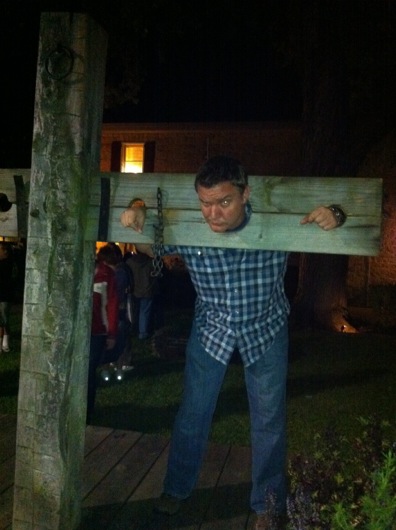
And then there's the obligatory shackles photo that EVERYONE was doing when they passed this place:
I won't even attempt to say what night we did which thing, so I'll just talk about what I remember from a given night, sparked by photos I'm finding in iPhoto. I'll have the events correct, but probably not the actual night it happened.
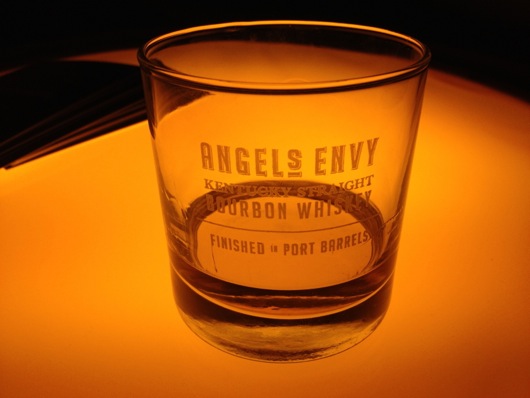
One of the nights, we hung out TWICE upstairs with the Angel's Envy party people in the historic Spalding Hall building in the center of the Bourbon Festival. It was dimly lit, had great music playing and they were serving their new Angel's Envy bourbon, which is finished in ruby port wine barrels. It was so smooth and sweet. Absolutely delicious.
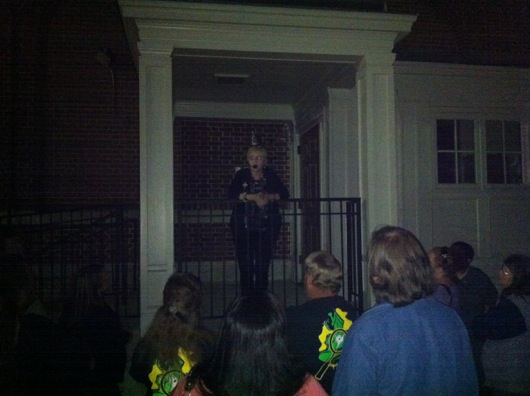
In 2011, we took the guided ghost tour because Ritch is big on ghostly things and it sounded like fun. A lady with a little mini amplifier and a fast-food-drive-thru headset talks you through all the stories as you walk around downtown. It's a hoot!
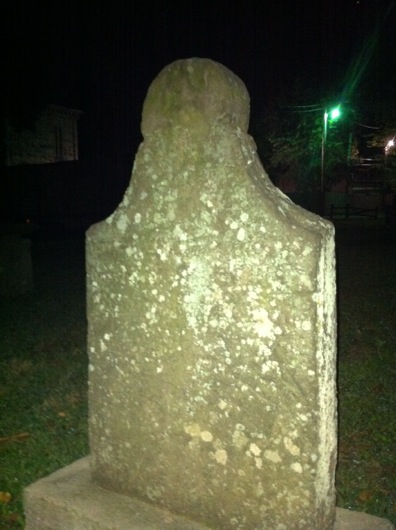
It winds up in a graveyard that is old as dirt and VERY cool!
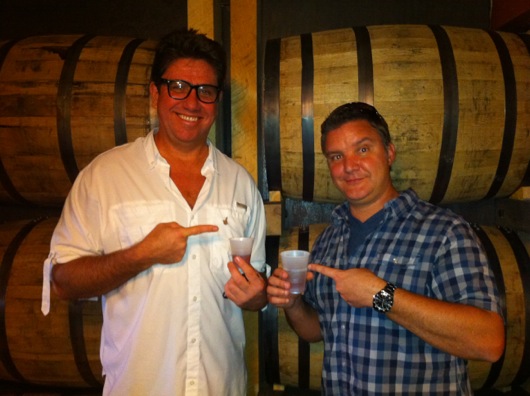
Eventually, we wound up downstairs at the Spalding Hall building for drinks and dinner. The bar side has sooooo many bourbons to choose fro, of course. Here's a photo of my buddies Dan and Ritch enjoying tea. OK, it's bourbon. The three of us hope to expand our troupe to more for 2013.
Bardstown is a little town and it's beautiful. The center of town where the Bourbon Festival takes place is quaint and the people are friendly. Here's Ritch being a tourist:
If you haven't been to a Bourbon Festival, you have to do it at least once. Even if you're not a bourbon drinker, it's still fun. It's like the alcoholic version of the squash festival from the 80's movie Doc Hollywood. The town it great. The food is fantastic. The music is awesome. The people are super. The proximity to so many incredible distilleries is priceless. Get there. I'll be there with a slightly larger contingent than previous years, I think. I'll be tweeting like usual, so look me up.
2012 Kentucky Bourbon Trail
 I now make the yearly pilgrimage to the Kentucky Bourbon Festival. I start out by flying into Nashville, Tennessee to make the road trip with my best friend, Dan. I've known him for 30 years (insert old jokes here). He works at Country Music Television (insert country music jokes here). I can't stand country music (insert... Oh, carry on). To prime my liver, however, we went to honky tonks in downtown Nashville. You can tell by the photo that I am not a country music fan. But, we had a great time, nonetheless.
We started out the vacation sampling Dan's best bottle of bourbon, and at the time, his only bottle: Willett Single Barrel Bourbon. It was delicious. I have three of their bourbons in my cabinet: Willett Pot Still Reserve, Rowan's Creek, and Noah's Mill. All very tasty. I've created a bourbon drinker in Dan. He's building his collection.
Jim Beam - September 14, 2012
First stop on the Kentucky Bourbon Trail: Jim Beam. If you look carefully in a select few photos throughout this tour, you'll see a repeating character, usually off to the side or hiding behind something and peaking out. Most often, he will have a finger up his nose. Classy is what we're about, you know.
On the Jim Beam tour, there are these great, "Photo Spots:"
Once you've seen one Photo Spot, though, you've seen them all.
Statue of Booker Noe, grandson of Jim Beam with the addition of a knucklehead, as my grandfather would say:
Dan and I decided to wander the property at Jim Beam. I think we missed the last tour. We'll hit this one next year for a proper tour. But, if you do just wander, you can get a good fill of bourbon history. You can walk through "Warehouse D" on your own. It's really cool. The smell of a real live bourbon storage rack house is unforgettable.
Here is an interior shot of Warehouse D:
Heaven Hill - September 14, 2012
Heaven Hill Distilleries makes a number of popular spirits that you've likely had or heard of, like Hypnotiq, Christian Brothers VS Brandy and Admiral Nelson's Spiced Rum. But we stopped by this particular distillery for the bourbon, of course. HH makes Elijah Craig, Evan Williams and a new one that I hadn't heard of or tasted until this trip: Larceny, a wheated bourbon that was a tad strong neat, but was incredible with a tiny bit of branch water. In fact, during the tasting, they had us sample a little of the bourbon neat (some people winced). Then we added just a few drops of water to the bourbon and sampled it again. It was an amazing transformation of flavors. Where the flavors popped on your tongue also changed and suddenly a harsher bourbon was sweet and VERY palatable.
The tour of Heaven Hill was the first time I'd learned of the requirement for taller warehouses to have cross bracing in them to shore them up in case of tornados or earthquakes or giant Japanese sea lizards. I know from engineering basics and from flying parachutes with cross bracing that the triangular bracing is as strong as it gets. Since the tax man is so interested in the safety of the vast amounts of liquid gold in them thar warehouses, it's no wonder he wants the distilleries to brace the building. The HH tour guides will tell you why that is when you visit. ;)
I usually have Elijah Craig 18 Year Single Barrel and Elijah Craig 12 Year Small Batch in my cabinet and I like them both. I almost walked out of the gift store with the Elijah Craig 20 Year Single Barrel, but then I saw the $400 price tag (as I recall the number, anyway) on this Evan Williams 23 Year...
Needless to say, there is no way on this earth that my wife would let me drop four hundos on a bottle of bourbon. It's nice to dream, though.
Four Roses - September 15, 2012
Sadly, I can't find a photo of the outside of the distillery at Four Roses. It's beautiful and very familiar to, since I live in the southwest of the United States. The Four Roses building is done in a Spanish mission style architecture. Kinda common where I live. Nice to see in the middle of Kentucky. But, the interior is just as beautiful, especially to a bourbon enthusiast.
Condensers and stills and beers and wines, oh my...
The tail boxes are always cool to watch: So much pure white dog running out of the pipes. Amazing!
And a tail box like I've never seen before: CLEAR...
Wild Turkey - September 15, 2012
We were in a bit of a hurry at this point in the day, but I can't remember why. Could have been the barrel stacking races or we were hungry or something. Doesn't much matter. We were in bourbon heaven and we were going to be back again in 2013, so rushing one of the tours wasn't that big of a deal. Although, now I'm really looking forward to meeting some of the Wild Turkey folks in 2013.
As I write this article, I'm supping Wild Turkey Rare Breed (barrel strength). It's 108.2° proof, but is smoother than that sounds. It's absolutely delicious. One thing I used to be snobby about was mixing anything into better bourbons. However, like I mentioned above, at Heaven Hill I learned that adding a few drops or a splash of branch water to a shot of bourbon can really open up the flavor. You really have to try it for yourself. It's quite amazing. I like Rare Breed neat, no water added. But I wouldn't recommend against adding a tiny bit of water to take the edge off and twist the flavors a bit if the flavor is a little strong for your taste. It's great, either way.
Now, sadly, we didn't take the tour at Wild Turkey because we missed it by a little bit, but they were kind enough to bring us to the back tasting room and allowed us to sample their yummy bourbon wares in a kinda private little tasting session. It was awesome. I'd never had any of the Wild Turkey bourbons up to that point. I went right for the Rare Breed, of course and bought some immediately when I got home.
Also, the tasting room has a turkey.
Woodford Reserve - September 15, 2012
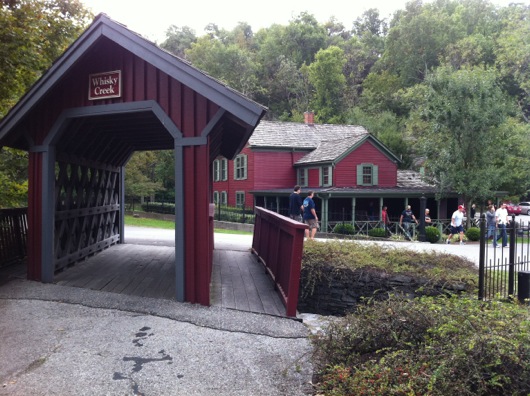
I know I say I love this bourbon and that bourbon and I say that a lot. Really, I've only met a couple of bourbons that I would consider, "eh." I just love the flavor of bourbon in general so much that I think I like them all. But, Woodford Reserve is most definitely one of my favorites. Even better is its brother, Woodford Reserver Double Oaked. Fantastic bourbon aside, you have to see the distillery! It is absolutely gorgeous.
The buildings are built with über-thick walls of limestone and wreak of history. Well, it helps that their distillery site is a national historic landmark, I suppose.
The warehouses on the property may not be as tall as competitor warehouses, but it would take a tremendous force to knock them down.
Everything at Woodford was so clean and neat. The pathways from one tour stop to the next was pretty open and the tour guides were very knowledgeable. Their three big copper stills were impressive to stand next to.
It was a vVery nifty area around the stills complemented by brass-trimmed tail boxes:
It's always weird to think that the new barrels you see waiting to be filled are going to disappear into a warehouse somewhere for years and years. Here are brand new American white oak barrels waiting to be filled with Woodford Reserver "new make:"
Once those barrels are filled, they rolled on tracks to the warehouses...
The barrels stacked up and the bourbon maturing...
Delicious.
For some reason, it seems I took way more photos at Woodford Reserve than I did anywhere else. I have a couple of years of photos from Maker's Mark, so maybe I thought I needed to fill out my collection for Woordford in 2012. Who knows?
Maker's Mark - September 16, 2012
First off, let me note here that I am a Maker's Mark Ambassador, so there is a barrel in one of the rack houses with my name on it (mine and 19 other people). I've toured Maker's Mark twice, so far. I have Maker's Mark, Maker's 46 and Maker's White in my cabinet. This has always been my go-to bourbon because it's accessible just about everywhere. Is it my absolute favorite, hard to say with so many wonderful bourbons out there. Its flavor profile isn't as strong as I like, but it's still VERY delicious and I proudly serve it up at parties. It is a fine bourbon and I highly recommend it for sipping and for mixing. Maker's 46 is one step better, in my opinion. The flavors added by the additional staves used in the maturation give it more of the flavor profile I prefer. Maker's White (the Maker's right before it goes into a barrel) (or moonshine) is also quite tasty, but it's certainly an acquired taste. I used 2 liters of it to age myself in a Bluegrass Barrel (that post is coming shortly).
Maker's Mark, like Woodford Reserve, is a beautiful property. The grounds are kept up very, very nicely. This was the first official bourbon distillery I'd ever seen and I signed up for the Ambassador program right away for fun. The tour is fantastic. The grounds, though, make you feel like you're walking around on a movie set, I swear.
The tour, like most others, is incredibly informative and everyone is so friendly. I'm always amazed that we can walk right up to the fermenting mash. It smells amazing and watching the yeast farts is mesmerizing.
The ornamentation and finish on some of the equipement is incredible. The copper is polished to a mirror-like finish.
The hilarious thing about the outside of the buildings is the detail in the shutters. You can see the shape cut out of each of them is the silhouette of the famous Maker's Mark bottle.
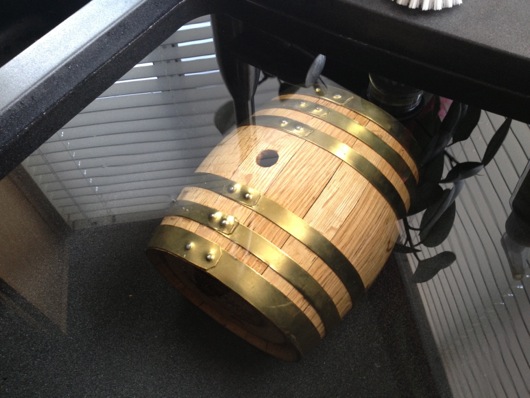
Somewhere in the Maker's Mark warehouses I have a barrel like this one with my name on it. Hopefully it doesn't have this large a hole in it.
Even the bottling line shares the architecture style of the buildings:
Becoming an Amabassador is free. Go to the Maker's Mark website and sign up. You get your name on a barrel with 19 other people and it will mature and you will wait. When your bourbon is ready, you can travel to Loretto and dip your bottles (see video of me dipping my own) and enjoy the fruits of your patience. I can't wait!
Summary
In summary, I'd totally do the Bourbon Trail AGAIN with friends. Many times. It's fun. I got a t-shirt. There are samples and there are samples. The countryside is gorgeous and the weather, knock on wood, has always been spectacular. All of the distilleries, even the ones not officially on the tour, are worth touring more than once. I swear I pick up more and more history and statistics when I hit each distillery. I've also been to the Jack Daniel's distillery in Lynchburg, Tennessee and it's equally as fascinating, even though JD is a Tennessee whiskey, not a bourbon. As a matter of fact, the JD tour is what got my taste buds yearning for corn whiskey when they puffed the mellowing tower lid in my face. If you visit them, you'll get what I mean here.


